
Fixing a Scratched and Chipped Cutting Board
Cutting boards take abuse. Knives slice into their surface leaving ugly marks and gouges. Is your cutting board plastic? Then it’s probably time for a new one, but if you have a wooden board you are in luck. One of the pros of wooden cutting boards is their longevity because they can be easily repaired, requiring no woodworking tools or experience.
Assess the Damage

Does your wooden cutting board have knife marks and maybe a nick or chip at the edge from that one time you dropped it? Then we’re in luck because all of that can be easily fixed.
If your board is splitting apart then you are in need of some more serious repairs. I suggest contacting a local woodworker, if you are in Portland, Oregon you can contact me, and ask them if they will help. Cracking and splitting, often caused by improper cleaning and drying, can be time consuming and tough to fix without the proper equipment such as a table saw, planer, sanders, and clamps.
Gather Your Supplies
While inexpensive to fix, you will need to make a trip to your local hardware store for a few supplies. Here’s what you’ll need:
Sand paper (80, 120, 180, and 220 grit)
A block of wood


If you have a power sander now is the time to use it, if not, sand paper, a block of wood, and some elbow grease will get the job done. The wooden sanding block will help save your hands and keep your sanding flat, after all the goal is a flat board, not one with finger shaped divots.
I suggest buying three grits of sand paper, 80, 120, 180, and 220. The lower the grit the rougher the sand paper. 80 grit is great for quickly removing the knife marks in your cutting board. Once those knife marks are gone, 120 through 220 will remove the previous sanding marks for a nice, smooth surface.
Sanding
Once you have your sand paper, find a safe spot to sand. You will be making a mess so I suggest a table in the garage. While you’re at it, I suggest putting on a mask too. An N95 is preferable to keep that fine dust out of your lungs.
Usually I would suggest using a pencil to mark the board so you can see where you have and have not sanded. This is just a squiggly line all over the board. But in this case, the knife marks will do the job for you. Your goal is to scrub them out, or mostly out.
Once your setup, grab your 80 grit sand paper and divide the sheet in half, folding it over with the rough side in, creasing it, then folding it back the opposite way and creasing it again. I prefer to fold the paper over, grit side out, and lay it on the table. Then press down on the seam. Now you should be able to rip it along your crease. Do it again with the half sheet to end up with a quarter sheet.
Now wrap that around your block and hold it in place with your hand. You are ready to sand.
This part is easy and time consuming. You do what you’d expect and rub that sanding block on your cutting board. But before you start, pay attention to the direction of the grain. You want to sand with the grain. What that means is you want to move back and forth with the length of the boards that make up your cutting board. If you go across the boards you are going to create more scratches much like those created by your knives and it’ll be tough to remove them later.
The key when sanding is the erase all of the pencil lines you drew on your board. You want to do this evenly and consistently across the entire board.
Avoid concentrating in the middle of the board, otherwise you will end up with a bowl instead of a board. You want to evenly sand the entire surface to keep the board level. You can periodically check the board with a ruler to make sure it is staying flat. If you see a gap between the ruler and the board that is a low spot, so stop sanding there.

If you don’t plan to do much sanding, I suggest going with a cheap, no frills sheet sander. These use regular sheets of sand paper instead of the sanding discs required for a random orbital sander.
If you get discouraged by the amount of work it’s taking, head back to the hardware store and pick up a power sander. Since you already bought sheets, I’d suggest a sheet sander. They aren’t the best sanders but the sand paper is cheaper than going with a random orbital sander and they’ll work just fine for what you are doing.
If you decided to give in and buy a power sander, or if you already had one, the pencil mark method still applies and like I mentioned, avoid concentrating on an area or putting pressure down on the sander to “make it sand faster.” All that does is wear out the sand paper prematurely by heating it up. Heat dulls sand paper. Also, note that it doesn’t matter which direction you sand with a power sander as it will vibrate in all directions, but it does so in such a way that it removes its own scratches. Sanding by hand requires a more methodical approach.
If you have any chips on the edges of your board, you’ll want to hand sand these. I like to feather them into the rest of the board. Your goal here is to remove any sharp edges so food doesn’t get stuck in crack.
Step Up the Grit
Once you have removed all your pencil marks and your knife marks you are ready to go up a grit. If you’ve been sanding for 2 hours straight and still have a few knife marks, I’d suggest moving on now. You may never get them out and it’s not worth the trouble, it’s a used board and that’s part of its character.
The good news is, it is easier to sand after the initial pass. If you made it through by hand you are now on the downhill slide.
Before you switch to 120 grit and follow the steps above, wipe your board down with a paper towel or rag to remove the 80 grit dust and grit. If you leave that dust and grit on your board you will be grinding 80 grit particles into the board with 120 grit paper negating the higher grit and causing scratches.
Once you are done move to 180 and then up to 220.
Wet the Board
You are so close to finishing, but before you do, get your board wet. You don’t have to soak it, just splash some water on the surface, making sure you get full coverage, and let it air dry. The water will raise the grain and make your smooth board feel rough again. Don’t panic, you didn’t ruin your board, you want to do this now otherwise the grain will raise after you wash it.
Once your board dries, give it a light sanding with 220 to knock the grain back down. Then give it a wipe with a dry rag again and you’re ready for the final step.
Finishing
We woodworkers use the word finishing as a generic verb meaning applying some type of sealer. In the case of a cutting board you want to go with a food grade finish. I start off with a healthy layer of mineral oil. For the food grade version, head to your local grocer and find the health section. It should be in the digestive aids area and it’s dirt cheap.

After applying a layer and letting it soak in for at least half an hour, wipe off the excess and apply a top coat. You can go to the big box store to get “butcher block conditioner” which is a mix of mineral oil, beeswax, and other stuff.

Or if you like supporting small businesses you can buy Keaton Beyer Woodworking’s Wood Conditioner. An all natural mix of food grade mineral oil and locally sourced, Pacific Northwest beeswax. I make it myself and let me tell you, it’s pretty great. The beeswax has an amazing aroma and I mix mine with a higher concentration of beeswax which gives the board more protection than the store bought kind.
To apply the product, just scoop on a dollop and spread it around with your hand to cover the entire surface of the board. Then let it sit and soak in for half an hour. Come back with a clean cloth or paper towel and buff it off. Since you are dealing with the raw wood you’ll want to do this twice for optimal protection. And now you have extra in your handy dandy little tin which you can keep near your cutting boards so you can reapply every 2-3 months with regular use to keep your board protected.
And you’ve done it. A little elbow grease and you a few bucks in sand paper and your board is good as new. Plus you’ve learned a new skill and can even call yourself a hobby woodworker.
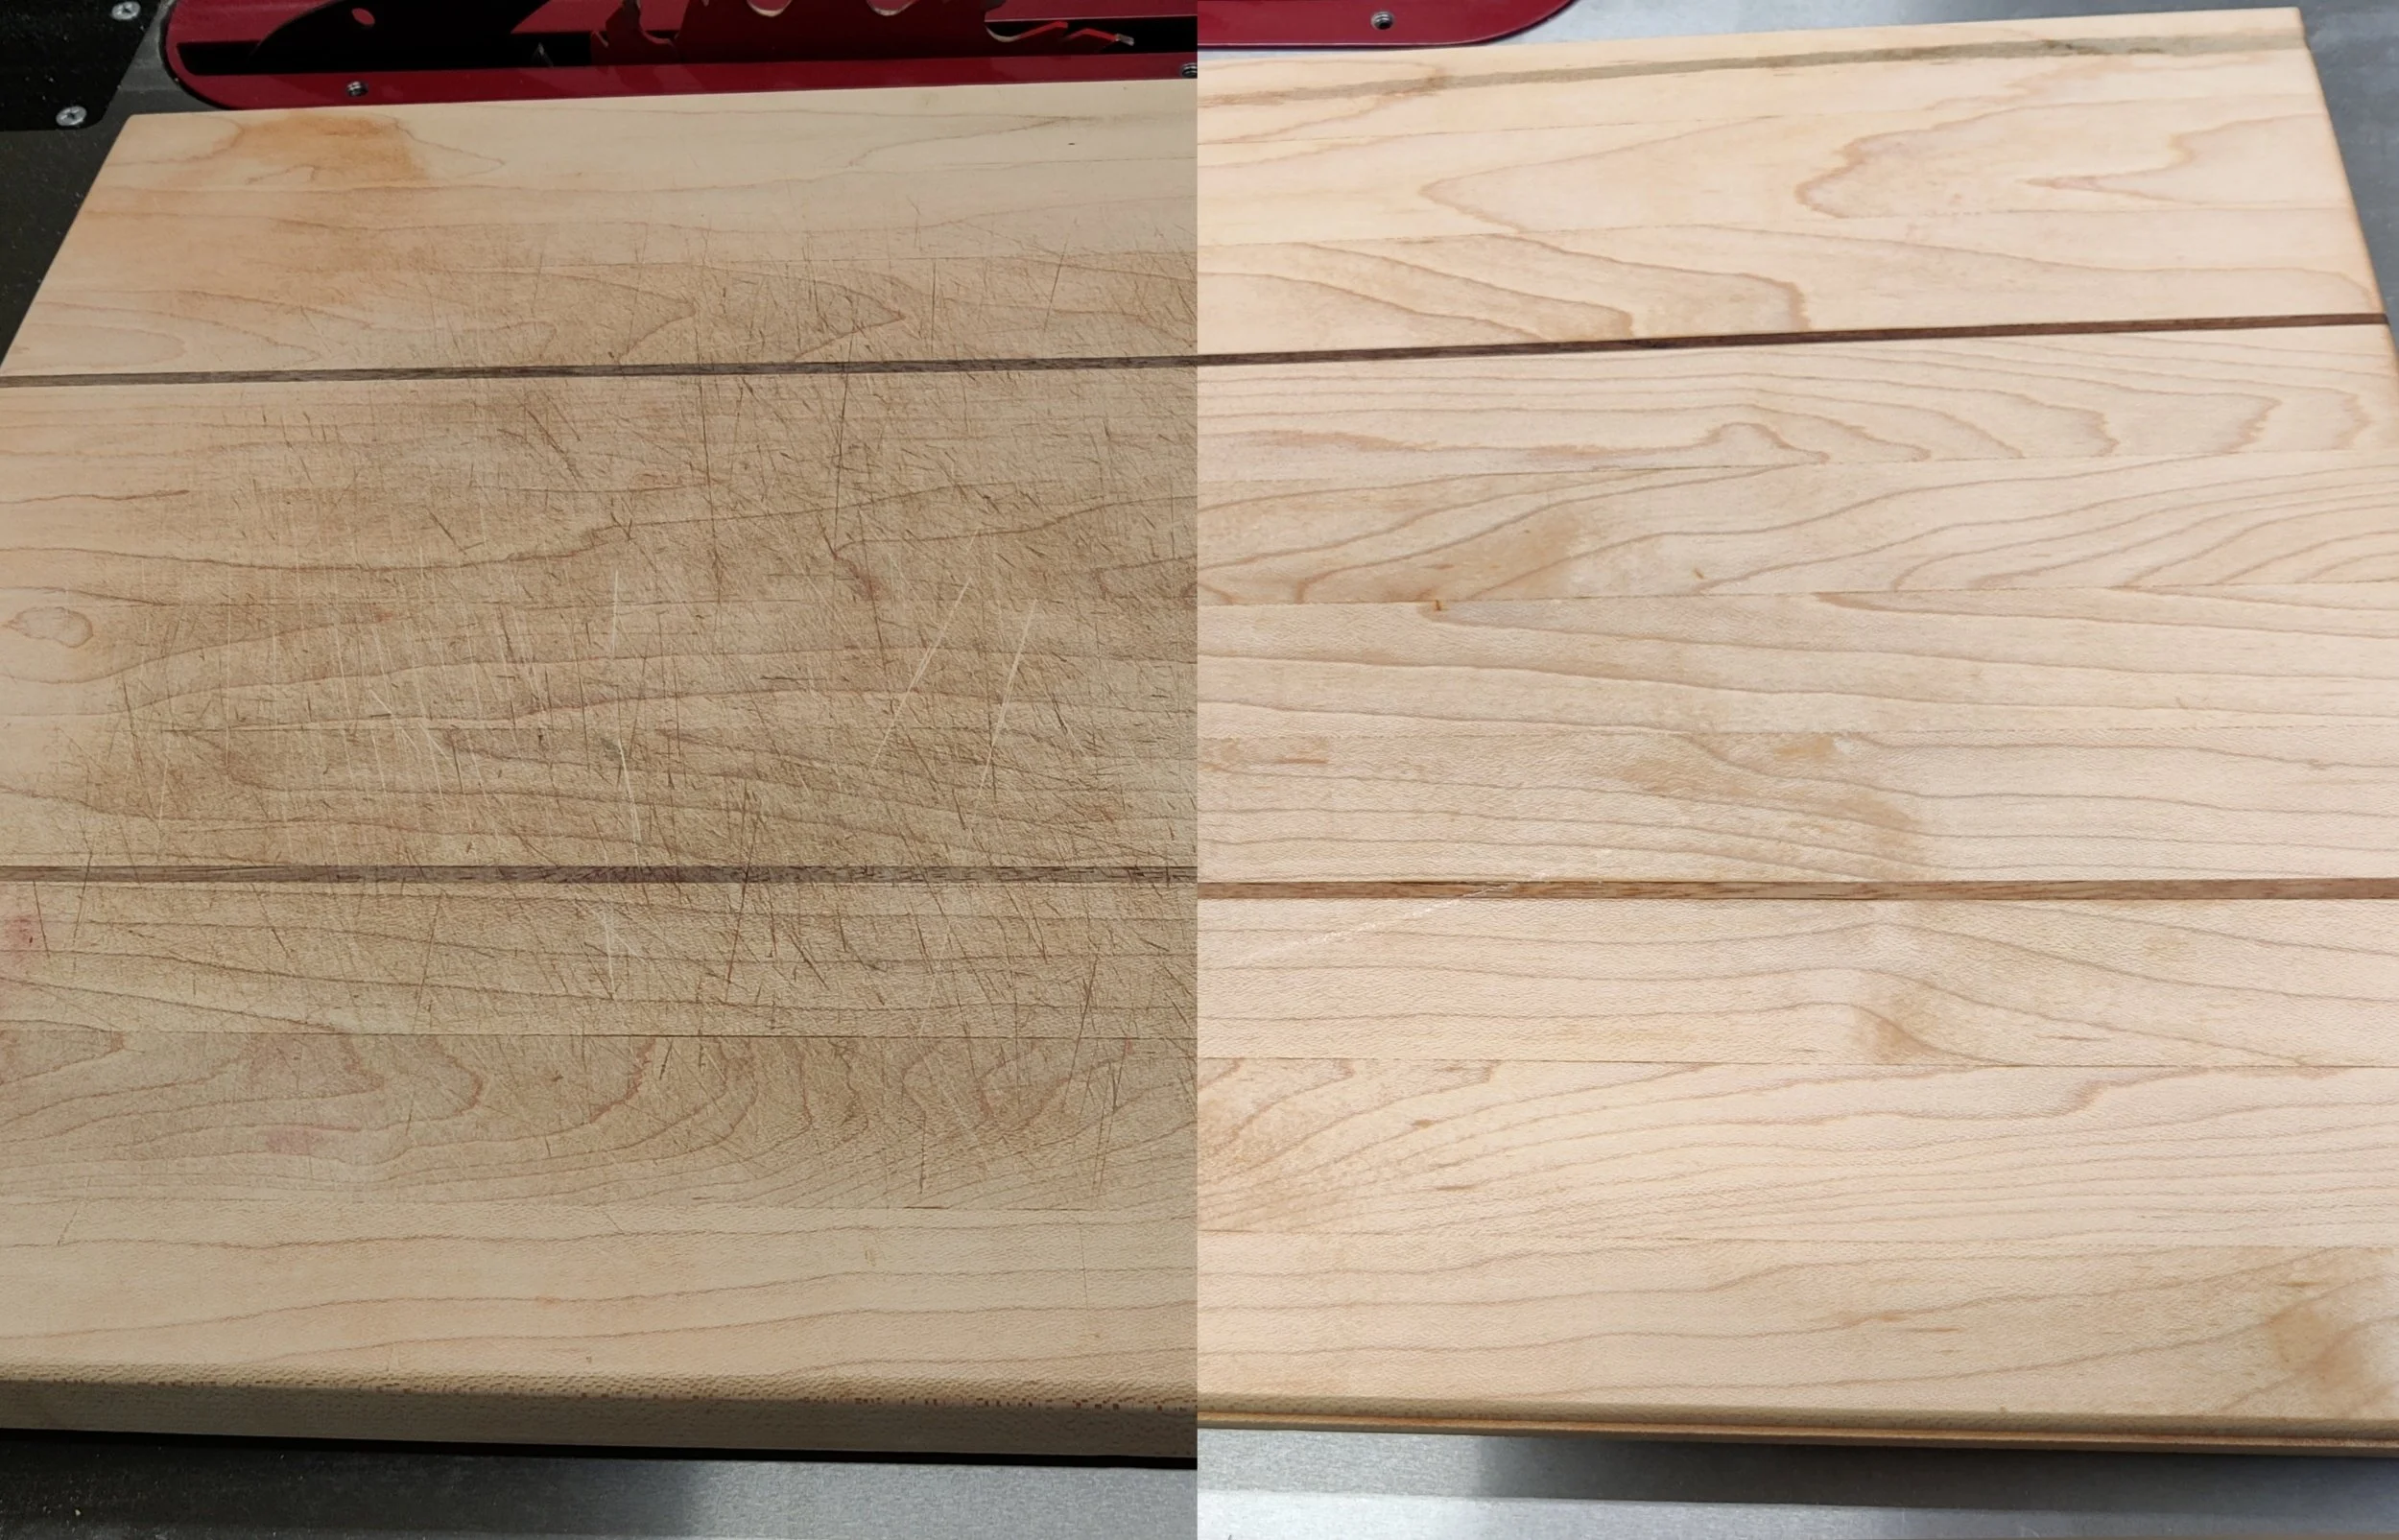
Before and After
For the visual learner, here's a video on a similar topic, but sharing four easy ways to accomplish this task.