
Shifting Priorities: Friday Update
This week I took a break from the cabinet. Not because I wanted to, but because I had a more urgent project hit my bench.
My kids go to a parent cooperative playschool/preschool which means we, as the parents, have an obligation to help with the school. There are a few forms this help comes in. My wife is on the board of directors for the school, I help out here and there when I can, such as fixing their back gate, and we volunteer in the classes to assist the teacher with the kids.
On top of that, we have fundraising we need to do and one form of that is a yearly auction. This year we are donating some of my work. Three pieces actually, all bundled together.
A pendant and necklace
KB Mini Teardrop Earrings - a new product I designed for this, based on my original Teardrop Earrings but smaller
A box to hold the jewelry
Here comes the urgency, the auction is in April and our items are due on 4/1, but next week is spring break so that doesn’t leave me much time to work. So I made all of these pieces this week, but I haven’t had time to take final photos which I plan to do this weekend.
Here’s a look at each piece.
Pendant

Okay, I lied a little. I didn’t make this pendant this week. In fact, it’s an earring I made a few weeks ago, but I did go through the trouble to cut and sand a pendant blank. After all the careful shaping to get the blank to the correct porportions I realized the size was identical to my already completed earrings. So I saved the blank along with my time, and grabbed an earring for the pendant.
KB Mini Teardrop Earrings
Knowing the pendant and the earrings can’t be the same size I decided to make a smaller version of my KB Teardrop Earrings. So I drew them out, cut the blank on my bandsaw, sanded, resawed, sanded again, applied finish (nail polish), buffed the finish, and installed the hooks. Sounds easy but this was challenging because the earrings are so small. They are about half the size of the original design, which I think makes them less formal and better for everyday wearing.

Mini Teardrops on the left, original on the right, which will be a necklace pendant in this case. Apologies for the sub-par photo, studio photos are coming!
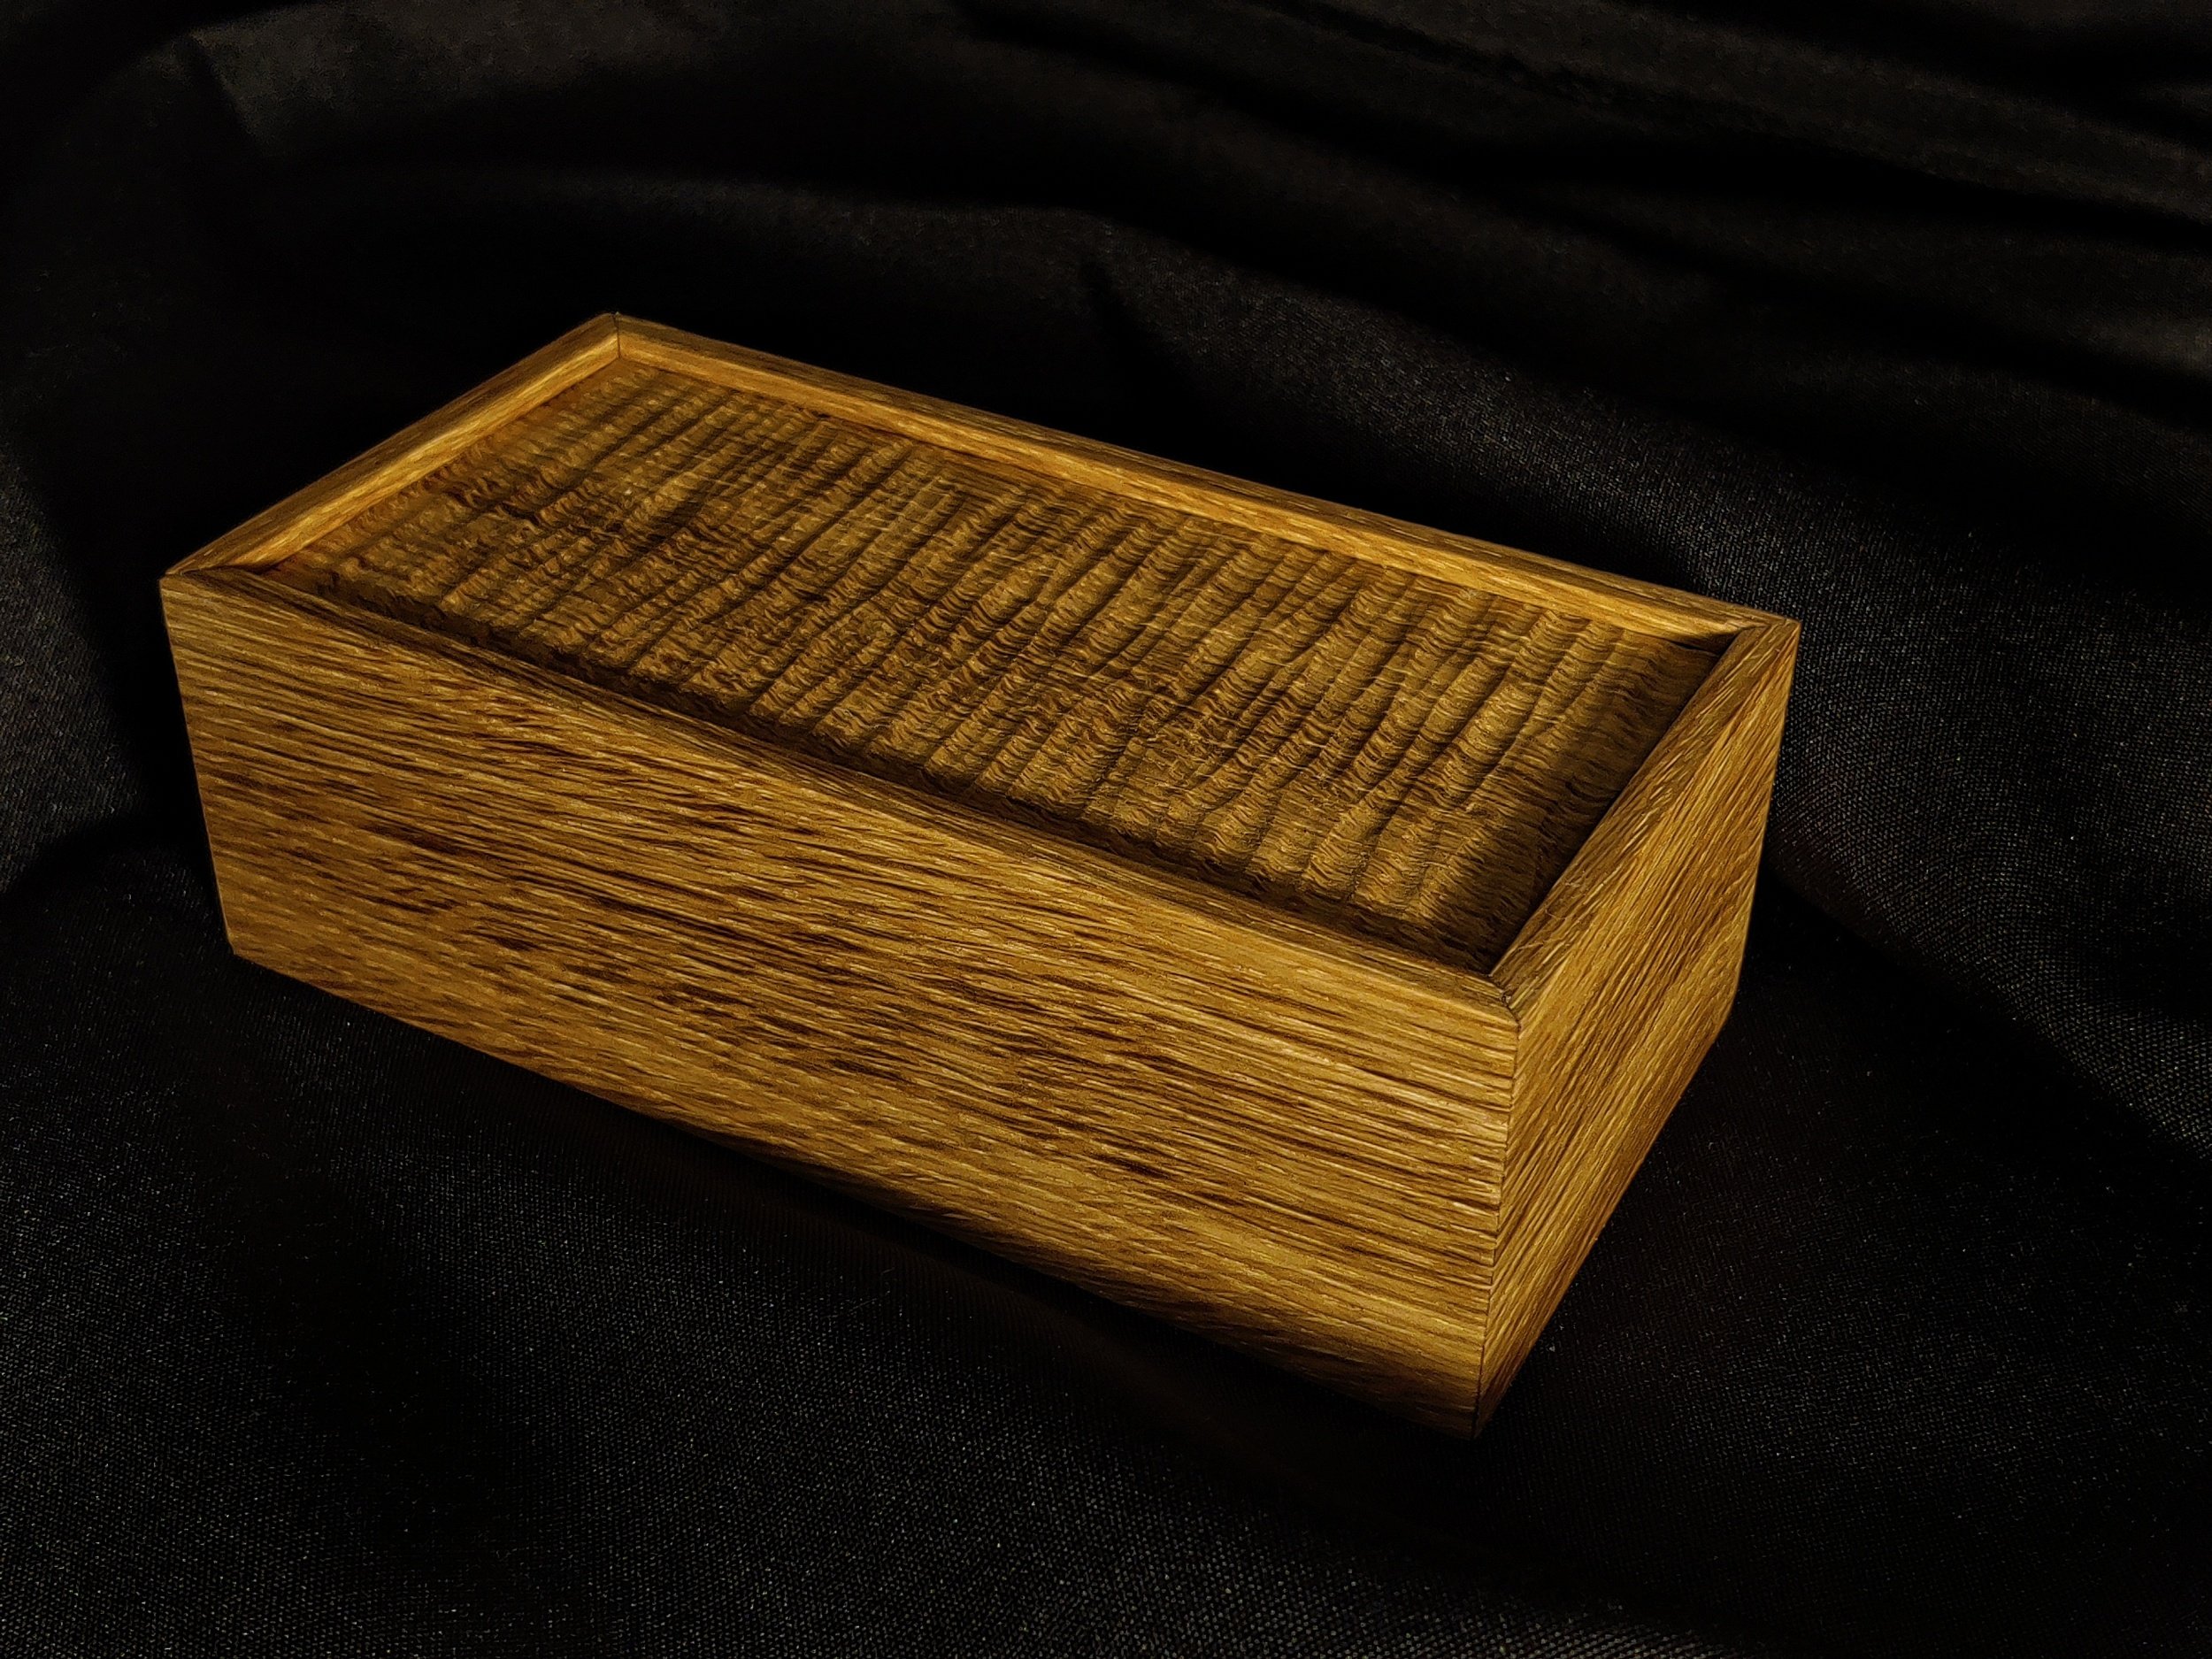
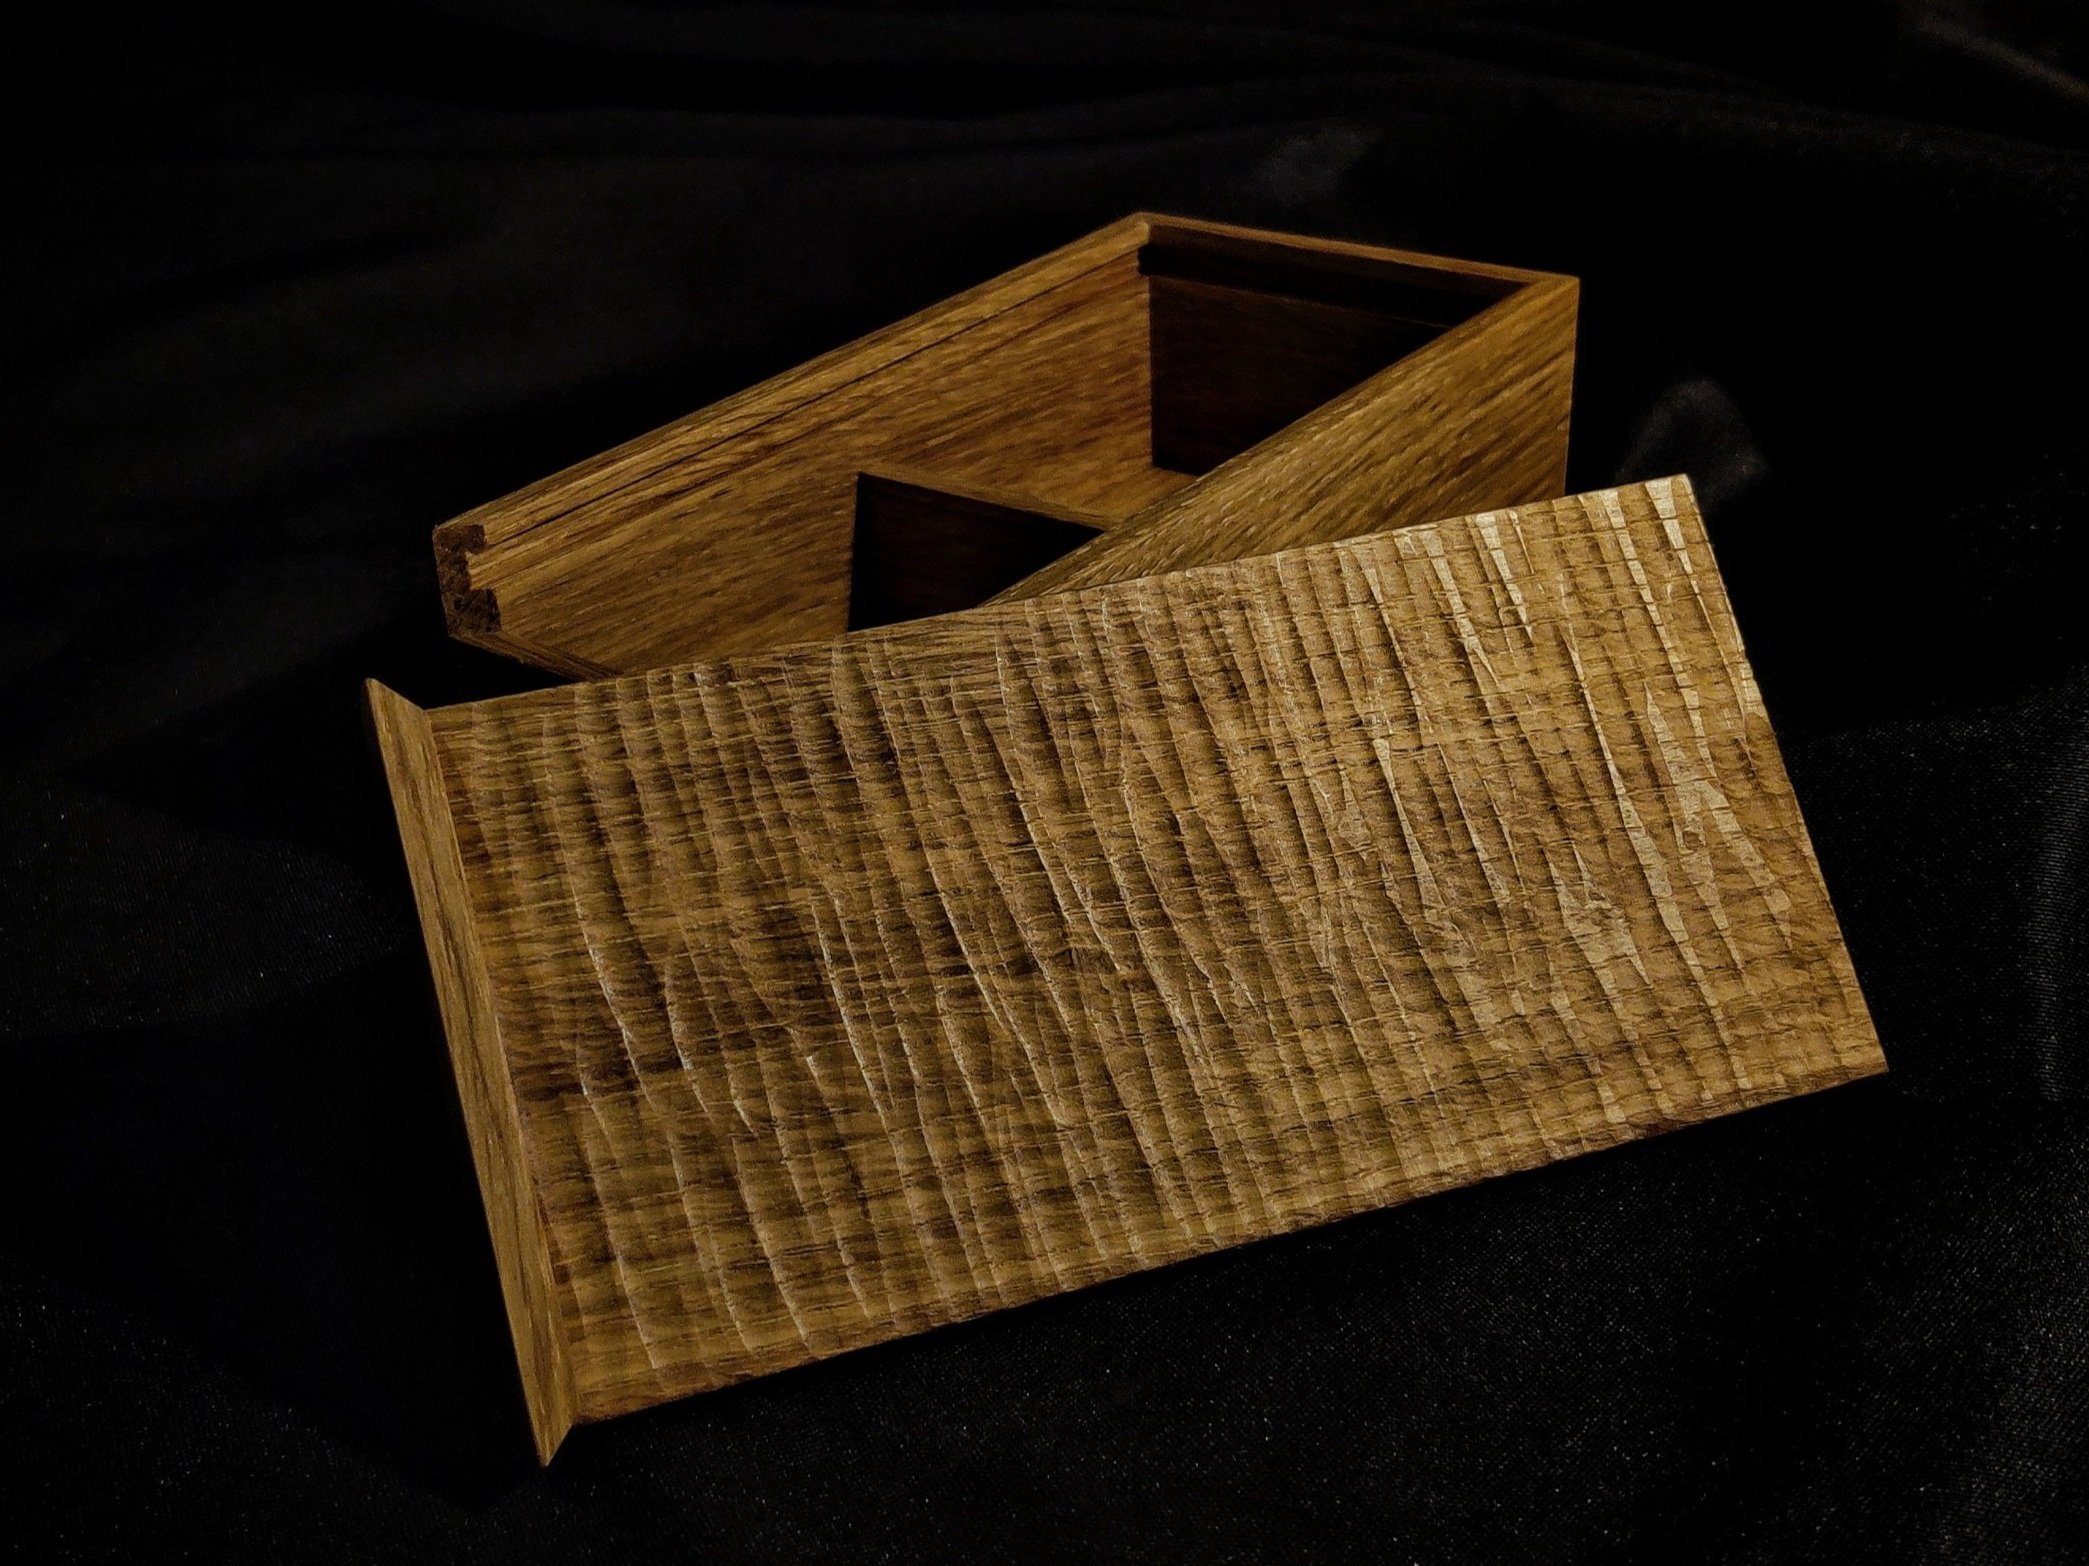
The Box
I should have a better name than box for this box. It’s not a cardboard box, it’s not even my normal jewelry boxes. My normal design is simply made for speed because the box is utilitarian. It’s purpose is to protect the earrings while in transit. This box needed to be a show piece. So I added some flare.
FIrst thing is the wood selection. I picked white oak to match the jewelry. But not just any white oak, I found a piece of rift sawn white oak which means the grain runs straight through the wood without the flecking. Great for grain wrapping around a mitered box. For those unfamiliar, that’s where the grain will flow continuously around a box, flowing from one face to the next.
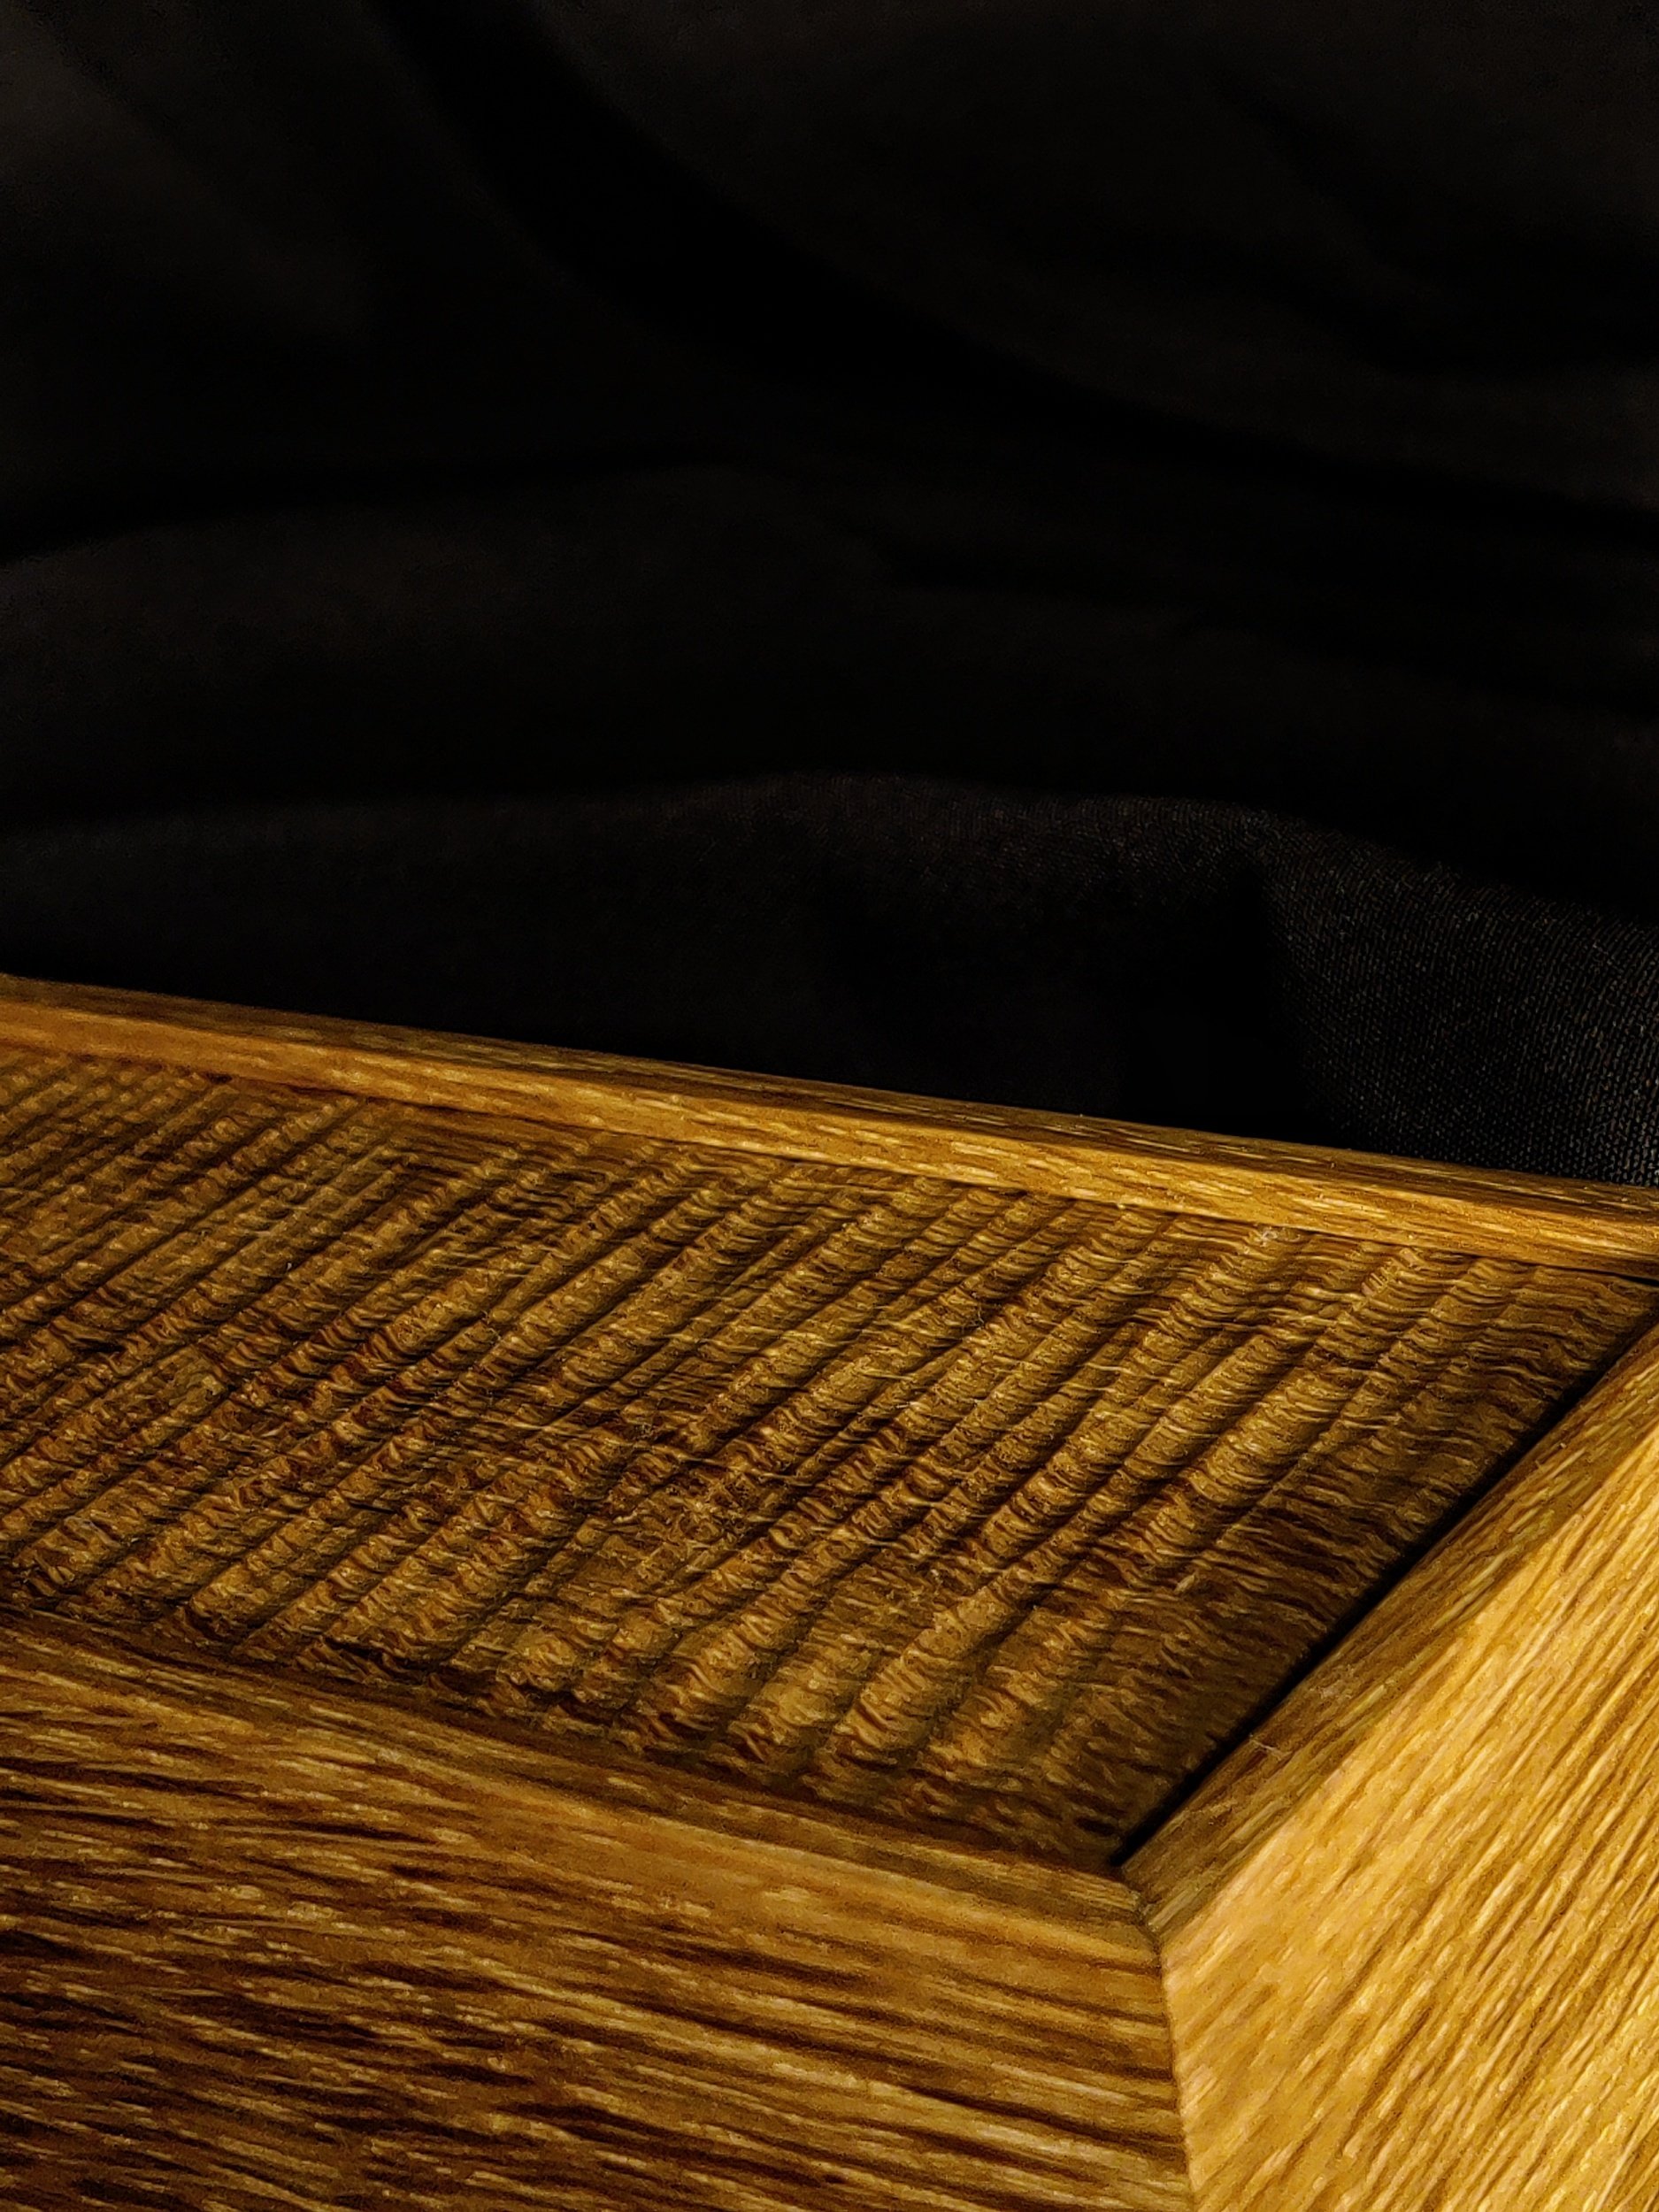
Next, I decided to gussy up the lid. See, I resawed all the parts from one board, which meant the parts had bandsaw marks. Most of which I planed out, but planing boards to just under 1/4 inch is prone to issues. The thinner a board gets the less integrity it has as the grain doesn’t have as many friends next to it to hold itself together. So you’ll get chip out and tear out, which happened in a few places. To fix it, I could hand plane or scrape it out, but that sounded tedious, so instead I made it a feature. I used a gouge and created a texture to the lid which removed or hid the tear out. This is the first time I’ve done this and it was fun. Only took a few minutes too, but the top is small.

The last detail was going to be ebonization. Ebonizing wood is a process where you take a solution of iron and vinegar and spread that on wood. The iron reacts with the natural tannins in the wood and changes it’s color. The higher the tannin content the blacker the wood becomes. Well oak is a notoriously tanniny wood, hence oak barrels for wine and tannins in wine, which makes it a great candidate for ebonization.

Testing ebonized white oak. It turned black, but the texture disappeared and the grain still shows through
So I dusted off my jar of rust and did some tests with results I really liked, but I decided against using it in this case for two reasons. One, I planned to do the outside of the box, leaving the lid natural colored to make it pop. But ebonizing the grain wrap would lose the effect, thereby erasing the attention to detail I put into the box. So I thought, why not do the lid. But after a test I found that the process reduced the textured look and, as Ashley said, drew your eye to follow the grain rather than follow the pattern I made.
So ebonization was thrown out. I’ll use it in the future, but this wasn’t the right project. I’m okay with that, white oak is very pretty in it’s natural color, so I’ll save the ebonizing for my red oak stock.
And if you like this box, or the design, or want to see an ebonized version, please leave me a comment or contact me. I’m thinking about making another version, but this time a little shorter and a little longer to be used as a pencil box.

Oh, and I am making a video on the building of this box. That’ll be out soon, maybe very soon if I decide to keep the voiceover minimal.
A Look Ahead
This is what I wrote for a look ahead last week. Turns out I was wrong, but life is full of pivots, so I’ll leave this here as it is my plan for next week, hopefully.
Next week I’ll finish sanding, flushing up any areas that need it. Then complete all of the final details I forgot about, do the final assembly of the case, and put the top on.
Then it’s time for the doors. I still need to find some glass for these, so if anyone has a good glass supplier in Portland, leave me a comment. I haven’t ordered it yet because I do not know what size the glass needs to be just yet. I want to make the doors to fit the cabinet first, then I’ll decide exactly how big each glass opening will be.