
4 New Projects: Friday Update
What a week. I don’t think I’ve been this busy in a while, and that’s because I had four clients reach out resulting in 3 projects, plus one of my own I already started.
The problem is the clients are less patient than my wife is so their projects will come first. But I had some time while I waited for the opportunity to buy more lumber.
That meant I needed to make as much progress as I could before I have to start the new projects. So let me show you want I’ve been up to.
Entry Table
Last Week
I started this entry table last week, but last week was my 2 year anniversary of Keaton Beyer Woodworking so I shared my woodworking journey. If you missed it, here’s a link.
In that time two weeks ago I worked through the very beginning steps of the entry table project by rough cutting boards, milling them flat, and gluing up the top panel. This all took way longer than it should have.
The reason why is because I had two boards I intended to use for the bulk of the wood on the project, excluding the legs which I had some leftover 8/4 stock for. The problem was, one board was almost entirely sapwood and I didn’t want to use it. The other board looked nice, but had a few knots I needed to work around.
That resulted in a need for more lumber. Luckily I had enough stored away in my lumber rack, but it took me a while to recast my plan in different lumber and make sure all my parts would work as planned. And honestly, they didn’t, but I made a few modifications and selected non-walnut for secondary items like the internal dividers and drawer boxes.

This Week - The Legs
With the logistics and lumber out of the way I could move on to cutting parts. The order of operations on this project is very important because I cannot make certain parts until other parts are done.
For instance, the legs have a curve at the top and a taper down the leg. Each of these curves and tapers were cut with jigs and a template, but they were all pretty darn similar, but not exactly the same.
Because of this I knew I needed to cut the legs first, then scribe the apron curves to the legs. The problem is I couldn’t do any of that until I had the mortises cut into the legs.
If I cut the curves and tapers first then I would be working on non-flat surfaces, trying to cut straight, flat mortises which would have been difficult.
If that confused you, I’ll lay it all out for the legs.
Step 1: Cut the boards into almost squares, but slightly wider than they are thick.
Step 2: Use the planer to turn the rectangles into squares.
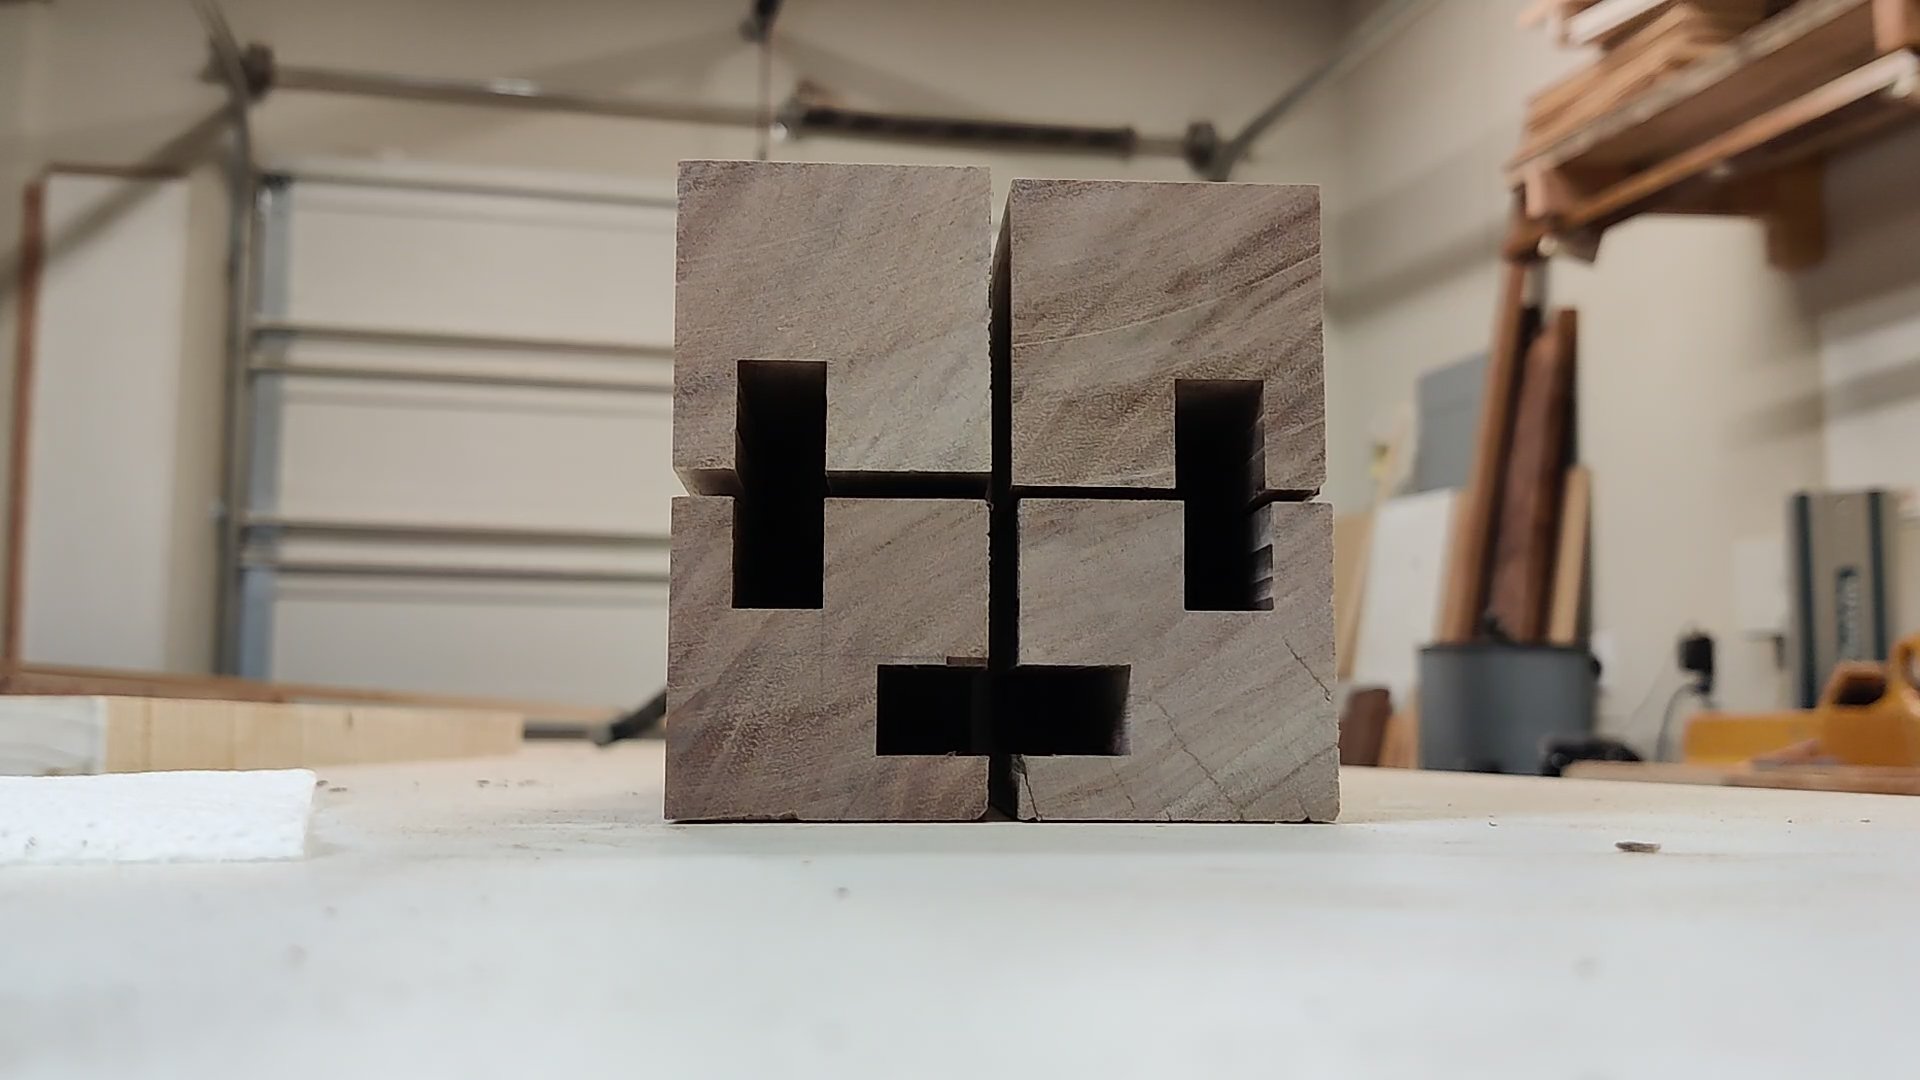
Step 3: Mark mortise locations.
Step 4: Use the router table to cut mortises.
Step 5: Create a template for the curves and tapers.
Step 6: Use the template to make a table saw sled for cutting the tapers.
Step 7: Cut the tapers on the two inside sections of the legs, but be careful which one you cut first so the flat sides can remain down.
Step 8: Use the template and a template bit to cut the curve until the template bit runs out of reach.
Step 9: Trim the remaining curve with a flush trim bit at the router table.
Step 10: repeat steps 8 and 9 for second side of the legs.

Cutting the double curve. One face is done, down, and the second is ready with the template. The router uses a bearing to follow the template and cut the same shape in the leg.
And that process results in four legs, mortised and shaped, except I cut one leg wrong. It was the front right, but I put the template on like it was the left side so the curve was on the opposite side. I fixed the error by patching the mortise and cutting in a new one. The patched mortise would face the drawers and be covered by them since it would now be on the inside of the curve. Not a mistake I wanted to make, but one I could live with since you’ll never notice it.

Flush trimming the patched mortise. With the drawers in you’ll never know it was there.
To cut the mortise I used the taper offcut to flatten out the leg and used one of the other legs to setup the router table to replicate the mortise. A bit trickier, but it worked well and the mortise matches the others which is what counts.
And That’s Not All - The Aprons
After those legs were done I could start working on the aprons which will connect the legs. But I couldn’t cut the matching angles and tenons in the aprons until after I cut in the sliding dovetails which will attach the top to the aprons.
But to cut the apron dovetail I needed to cut the dovetails into the underside of the table top. So I did a bunch of measuring and math, then I prayed I had it right, setup the router and cut four dovetail dados.

Four stopped dovetail dados in the underside of the table top. Sliding dovetails are great because they help keep a panel flat, and these plainsawn boards are going to need the help.
With those done I could transfer the router back to the router table to set that up to cut the apron sliding dovetails. I didn’t have a test piece for this, so I left the aprons intentionally wider than I wanted them to be so I could sneak up on the fit with the actual workpieces. Then, I ripped the aprons to final size.
What I’ve ended up with at the end of two weeks is parts, partially ready for dry fit. The sliding dovetails slide, but need to be trimmed as they are blind meaning they won’t slide all the way out the front. The apron curves need to be cut and tenoned so they will fit. Then the back apron will need mortises and the middle dividers need dovetails and tenons. Oh, and I’ll need to add a detail to the corners of the table so the legs nest into the top.
With that, I’ll have the components for the table done so I can fit them together and start on the drawers.
But those drawers will have to wait as I start on a coffee table and sofa table, two of the three new projects. The third is a small project, refinishing a cutting board which should go fast.