
A Sappy Post about Christmas Trees: Friday Update

I ended last week sharing this picture of a project inspiring my next build. The stocking trees. I’m making two of these for a client who wants to use them next Christmas to hang her family’s stockings. I am changing the design a bit, getting rid of the finial and top plate for a sleeker design, something I wanted to do after building this in the first place.
Milling
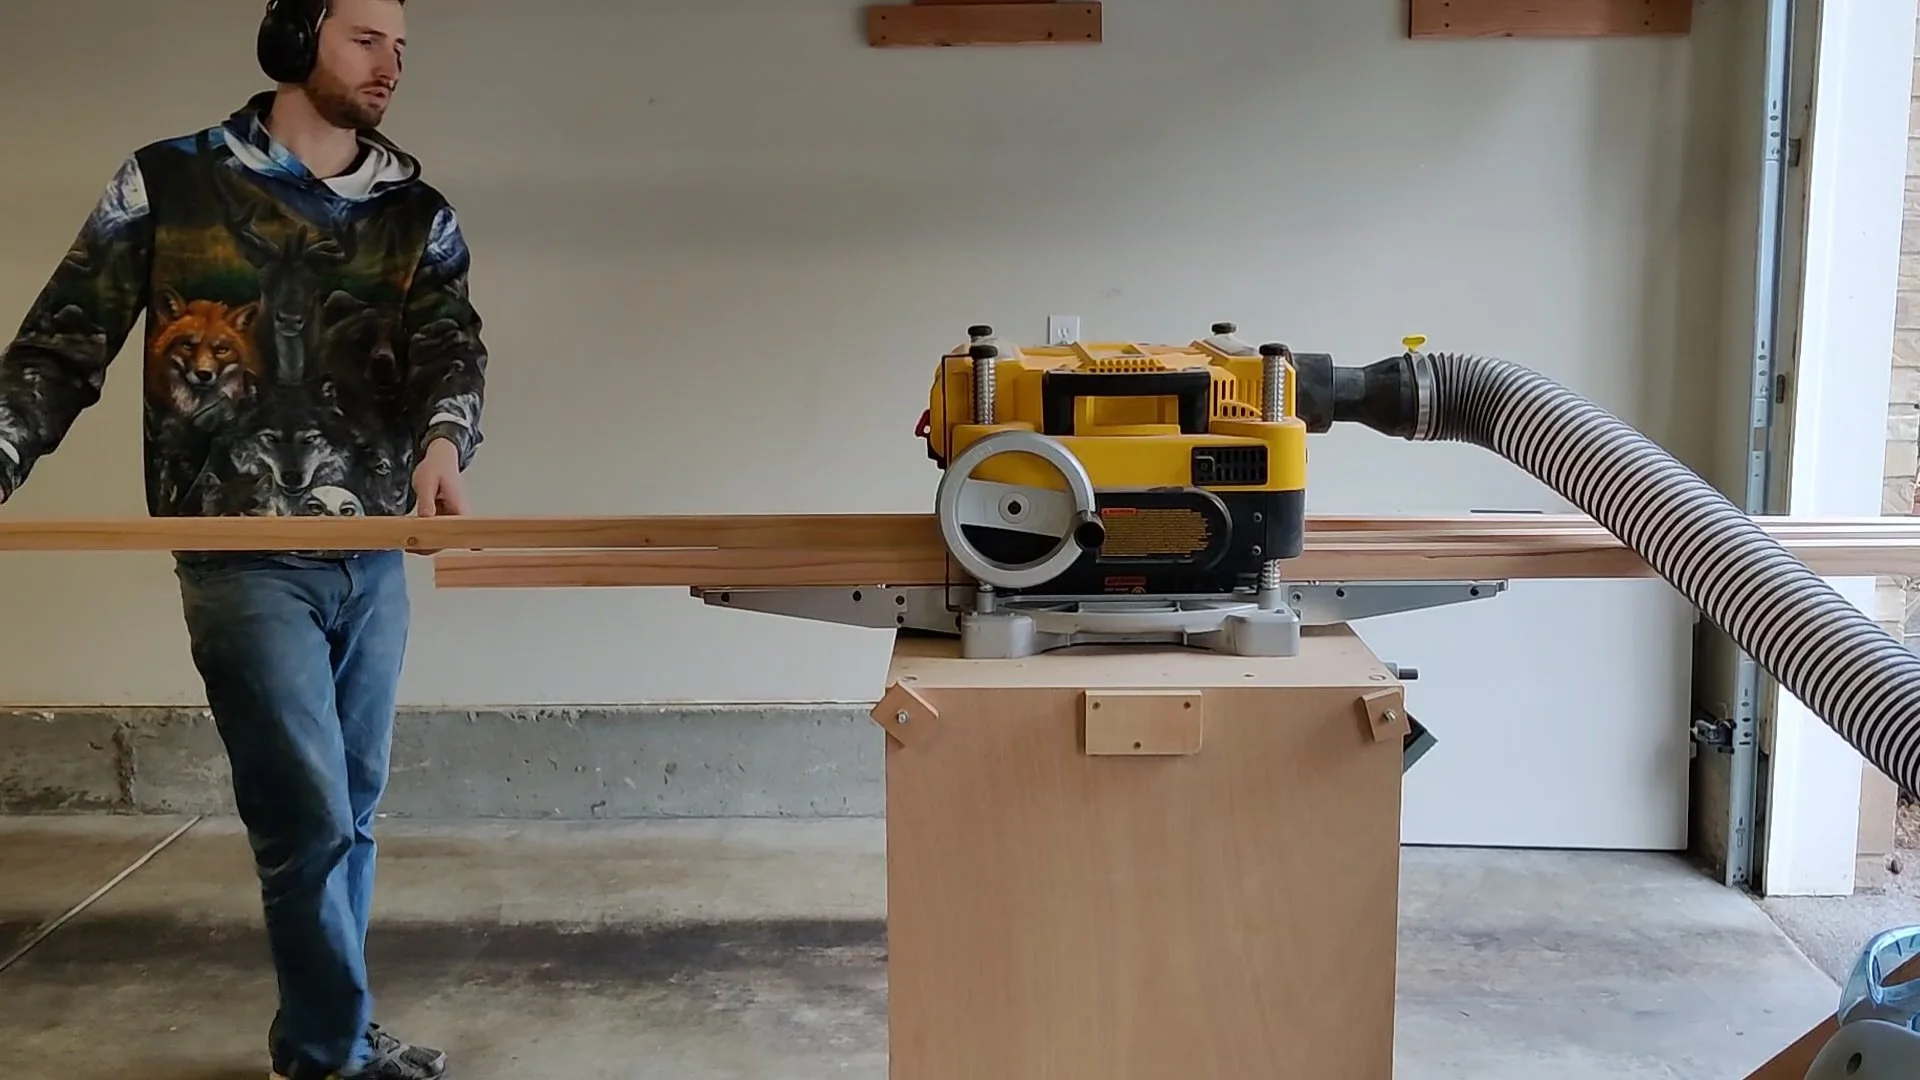
The first step to any project is to mill up the lumber. Milling is a funny term for this process in my opinion. When I think of milling I imagine a barn with a giant saw 6 feet across, ripping logs in half.
What I actually did was use my little table saw to cut my boards to a reasonable dimension, then run them all through the planer to flatten them. These boards aren’t really flat, but flat enough. To make them truly flat they would need to be jointed, but I don’t have the ability to joint an 8 foot long board, so I went with flat enough knowing I’ll be able to force them into place later.
Sap
I ran into an issue with these boards, they weren’t dry and were leaking sap. So, I figured out a solution which I documented in a YouTube video, released on Tuesday.
This one is short, only a couple of minutes long, and shows a quick and easy, DIY way to stop sap from seeping out of boards. I won’t dive into the details as I have a full article on the subject coming out next week.
It wasn’t a huge deal but it did set me back a bit as I had to deal with the sap up front to avoid these boards gumming up my table saw. It took me an hour to deal with all the sap issues. Then I’m going to have to go back after the parts are cut to do it again in finer details so these boards don’t leak sap after the project is complete.
Getting Jiggy
Jigs are a great way to improve consistency. I setup a miter saw jig to cut a consistent angle on the tops of each of my boards. This jig allowed me to hold my workpiece at a 90 degree angle to the fence, and then cut at a 7 degree miter all of my angles exactly the same. I came back later and cut each board to length, mitering and beveling my saw to 7 degrees on both so the feet sit flat. I cut each board with a stop block to ensure consistency so each board was the same length. I also paid extra attention to make sure I cut the angle the correct way so the sides leaned in.

Assembly

These trees are big with angles making them hard to connect via a wood based joinery method. So I went with screws. Don’t worry, the screws won’t be visible when it’s all said and done, the screws are counter sunk and I plugged them.
I was hoping the screws made assembly easy. Turns out it didn’t. I had some difficulty keeping the stretchers aligned, especially on the first one. Then I got smart on the second and clamped the sides and supports down to my table prior to pre-drilling and adding screws.
I assembled two sides of each, then put the tops together while standing up. I noticed that the legs were not quite at the right angle so my side stretchers had about a 3/4 gap where they were supposed to land. Not a big deal as I knew I could pull the whole assembly together with a clamp, but I didn’t want to stress the top joint before the glue had a chance to set, so I waited a day to put on those final two stretchers and to add the second, higher set for final assembly.
Sorry if that was hard to follow, I’ll make it clearer in the video when that is ready to come out, so stay tuned!
Stocking Hooks
At first I bought hooks which were way too big, those went back to the store and a week later these showed up from Rockler. These hooks will hold the stockings, but I need a way to put the hooks on the tree. I didn’t want to just screw them to the tree, what if the client wants to put the trees in a corner and the back hooks are never used?
So instead, I made little wooden brackets which slip over the stretchers. This way they are moveable to meet their needs. Now I have to sand, stain, and finish all these little wooden pieces… Extra work for me but I hope my client appreciates it!
Sanding
I got smarter as this project progressed. I was eager to put the first tree together and did neglected to sand the insides pre-assembly, making sanding a chore. The second one I pre-sanded at phases of assembly to make sanding easier and faster (yay random orbital).

Next Week
Everything is ready for the finishing process which starts with a seal coat of shellac. I bought the spray kind for easy application. After shellac, a gel stain will go on. I’ve never used a gel stain before, so I’ll let you know what I think of it. What I read is the gel stain sits on top of the wood and doesn’t blotch in softwood as bad as oil or water based stains.
Last step is to top coat. For this I’m going with an oil based poly. I have yet to decide whether I will brush, wipe, or spray. I don’t really like using oil based polyurethane, but in this case it seemed like the best option for the project. I would use a water based version but the gel stain is oil based and I don’t like mixing oil and water. It could be okay if the stain is cured, but if it isn’t then the water based top coat won’t stick and I don’t want to have to resand these things.
After all that the project is done and ready for delivery. Hopefully the rest of this one goes to plan. It’s nice to have a quick project once and a while!