
How to Build an End Grain Cutting Board
End grain cutting boards. The cadillac of cutting boards. This article will explain how to make an edge grain cutting board, but you need to know about cutting boards first. Did you know there are three basic types of wooden cutting boards.
Face Grain
Edge Grain
End Grain

Walnut, Maple, and Cherry Face Grain board. Using face grain allows for a bigger board using less wood, but face grain boards are limited by your board thickness, this one is just under 3/4 inch thick.
Face grain cutting boards are made by gluing multiple wide boards together on their edges. Once glued, sand them smooth and you’re all done. This orientation of the boards usually means these boards are thinner because you are limited by the thickness of the board you can get. The cutting surface is also a distinction here because you are using the long grain of the board, meaning you are cutting across the grain like you would be cutting down a tree. If you’ve ever sawed a board you’ll know it takes more effort to cross cut across the grain which means your knife is dulling itself faster when it cuts into the wood.
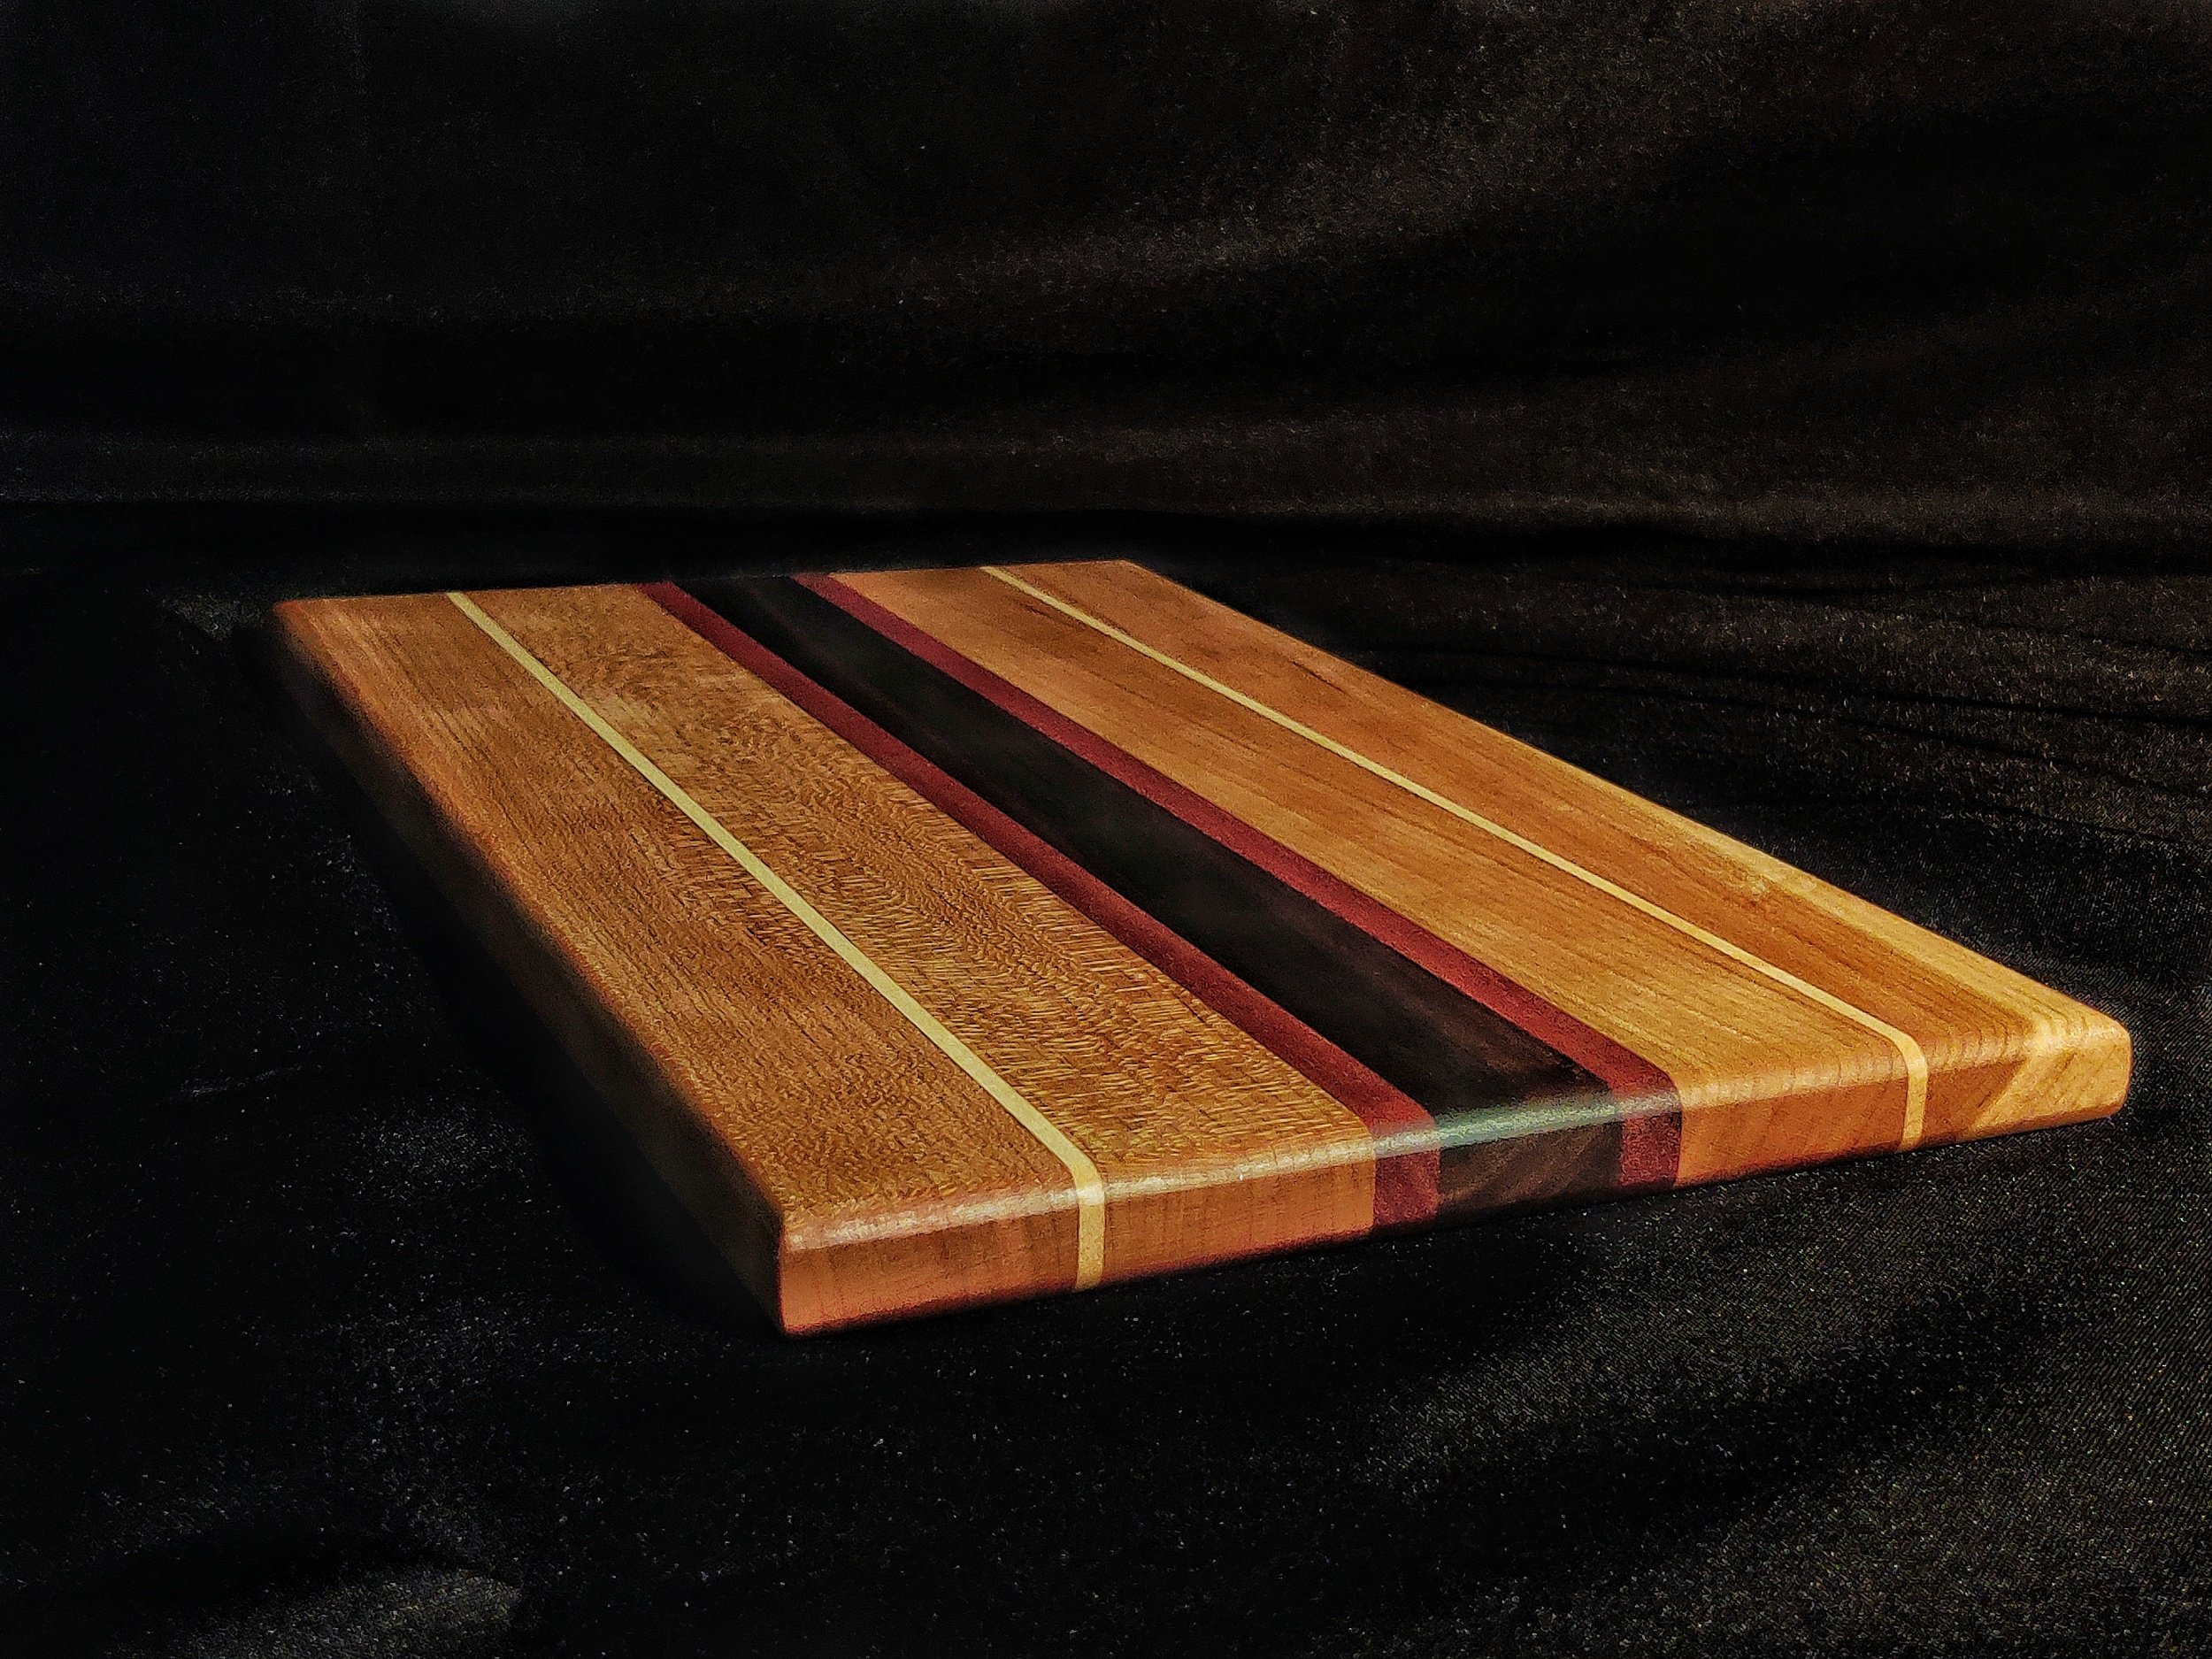
Cherry, Maple, Sapele, and Walnut edge and face grain cutting board. Edge grain allows for thicker boards, but that thickness means more wood.
Edge grain are similar to face grain in that your cutting surface is made of the long grain running across the board. The only difference is you can make a board thicker by resawing your boards and gluing the faces together. The grain is still the same and the properties of an edge grain board is the same as the face grain.
End grain cutting boards are different. They use the end of the boards facing up which is much easier on your knives. Why? Well imagine a piece of firewood. When you chop that wood with an axe, it splits along the grain. If you try to do the same on the side of that piece of firewood you’ll be chopping for a while to get through it. The axe doesn’t have to work as hard to split that end grain. End grain is like a bundle of straws. If you stick a knife into those straws and pull it back out, the straws will push each other back into place. If you do the same with a face or edge grain board, you sever the connection between the fibers and they remain that way.

White Oak End Grain cutting board. You can see how the end grain gives an interesting pattern. Take a mental note to refer to this picture when I mention planning your end grain for a pretty pattern. In this case I flipped every other board 180 degrees before final glue up to make this pattern.
This property of end grain results in a longer lasting board which also does not dull your knives as quickly. But there is a downside. They cost more. Why? Because they take more effort and material. I’ll explain how as part of the build process.
The Process
Step 1: Select your wood
For a cutting board you want hardwood, specifically with small pores and high density. Good options are maple, cherry, walnut. Bad options are red oak, ash, or basswood (it’s too soft).
One weird one that I like is white oak. Red oak and white oak are very different. Red oak’s pores are so open you can pour water right through it. White oak is not, water doesn’t soak in easily (they make boats out of this stuff).
After you select your wood, you need to figure out how much you need. There is a useful tool for this called the Cutting Board Designer JS. It’s easy to use, just plug in how many strips you want, how wide each piece is, how long your boards are, and how thick. Leave the blade kerf alone, that is already preset at 1/8 inch.
The tool will tell you how big your board will be in both edge grain and end grain format. Play with the sizes of things to get to the size you want and now you know how much to buy.
If you don’t want to use the tool, here’s another way, say you are using up scraps. First lay them next to each other and measure the shortest board’s length, let’s say that is 26 inches. Then measure across the boards to see how wide it is, let’s say that is 15 inches. Now measure how thick the smallest board is and estimate how much you’ll have to mill off to get roughly to a thickness you’ll have after milling, we’ll go with 1 inch.
Now that we have those measurements you need to know how thick your end board will be. Generally speaking you want an end grain board to be no thinner than 1 1/4 inch, but preferably closer to 1 1/2 to 2 inches. The thicker the board is the less likely it will split. We’ll go with 1 1/2 inches.
So take 26 and divide it by 1.5. That tells you how many end grain strips you’ll get. 17.333. Now to make the math easy we’re going to ignore the blade thickness, also called a kerf.
So, we have 17 slices. So your board will be 15 by 17 because each of those slices is 1 inch thick. If that is smaller than you want, either add more boards to increase that 15 inch measurement or get longer boards. You can also decrease the thickness of your board, but doing so risks the boards integrity, so do this at your own risk.
Step 2: Milling
Mill it. This is easier said than done. If you don’t have things like a thickness planer, a jointer, and a table saw, then buy pre-milled S4S wood. S4S means Surfaced four Sides aka, they already flattened and squared the boards up for you so you are ready to use it. The problem with this stuff is it is generally thinner than you’d want, but it will work. You’ll just need more of it.
I’m not going to dive into a detailed milling guide, there are plenty of YouTube videos on the subject. Here are the basic steps
Flatten one face of the board, either using a power jointer, a planer with a sled, or a hand plane and winding sticks. I did write an article about using a planer sled for this step, my preferred method until I get a jointer. Here is also a video of using a planer sled. Sorry it’s so small, you can expand it to full screen for a better view.
Once you have one flat face, flip the boards over and run them through the thickness planer to get a second side flat and all of your boards to the same thickness.
If you already have one edge of the board straight, then reference that to rip the second side straight on the table saw. If you don’t, you have options as explained in the below video.
Now you have straight, flat, square boards ready for step 3.
Step 3: Glue up
Before you even reach for the glue bottle there is one important step, orient your boards based on the end grain. I like to lay all my boards next to each other on my bench and look at the end grain, then start moving them around to get them to look good. Generally that means having grain run into each other at complementing angles.
Once you figured out your order I like to write down a number on each board so I don’t confuse myself. Then I clamp the boards together to see if there are any gaps in between boards. If there are, I mark them, unclamp, and use a handplane to fine tune the fitment between boards. This way there aren’t any gaps later. Once everything is fitting nicely with no gaps, you are ready.
Gluing boards together is easy. Doing it well requires some attention to detail. First step, if you are using bar clamps or parallel clamps, put them under your boards now. Then take each board and put one edge up, making sure it’s always the same edge and leaving the last board in place. Next, make sure you have everything else you need ready. You will need glue, a wet rag, clamps, and cauls (4 in total). Cauls are boards you use to keep your glue up parallel. I use 2x4s with a piece of plastic packing tape on the side that will touch the glue. Glue will not stick to the tape. I’ve also used melamine, thinking glue won’t stick to it, and been mistaken. Use packing tape on some wood.
Now spread on your glue and flip your board down in the correct position, one after the other. I validate that the numbers I previously wrote down are all facing up, in order, and on the same side. That way I know I didn’t mess anything up.

Before you start cranking those clamps down, this is where those cauls come in. You’ll need two on each side, one for the top and one for the bottom. Just take two clamps, one on each side, and clamp the cauls in place. Don’t make them too tight yet, the boards will still need to slide together.
Now you can tighten those clamps your boards are sitting on. Then add clamps in between and on the edges from the top. This step is important. As clamps put pressure on your boards they actually pull the boards toward their bars, causing the boards to cup. If you have clamps on the top and bottom they will pull against each other and offset to keep the boards aligned and straight. The cauls also help prevent this, but I like extra insurance.
Now wipe down excess glue with your wet rag and wait.
Step 4: Cut it up
Once your glue is dry, overnight is adequate, then remove your clamps and scrape off excess glue you didn’t wipe off. I use a putty knife or a chisel. Just be careful to not dig into the wood.
If you still have a nice straight edge on the end grain then you can go right to the table saw. If the boards slid a little bit, that’s okay, just cut a straight edge. You can do this by using a sliding miter saw to slice off a small amount. Depending on your cutting capacity on your saw you may have to flip the board and do this on each side. If you don’t have a miter saw, you can use a circular saw and a straight edge.
At the table saw, set your cut to the thickness you want your board. Previously we said the board would be an inch and a half but we ignored the blade kerf. So to add it back in, just measure from the fence to the far edge of the blade and set the fence 1.5 inches from this side. That way you are left with 1/8 under 1.5 inches for the board thickness but you made the math easier to figure out your board size.
Rip your strips putting them all in the order you cut them off as if you still had the board in one big piece. This is crucial for figuring out your pattern.
After you have your boards cut and on your bench, flip them all so the end grain is up. Now play with it. Rotate every other 180 degrees or flip the orientation 180 degrees on every other. See what looks good to you. Once you figure out how you want them, label them all like before so you don’t forget.
Step 5: Glue up again
You will follow the exact same steps as the last glue up, starting by clamping the boards together to see if there are gaps. If there are, hand plane or sand them smooth. Don’t run them through the thickness planer though, it’ll clog it up because you are going across the grain. You’ll be left with all these long fibers, clogging your machine and dust collection.
After you are left with no gaps, glue them up using the same glue up methodology as before.
Step 6: Flatten
There are three ways to do this. Sand with a hand sander for hours. Use a drum sander. Use a hand plane and sand.
I’ll go over the last option because it’s the fastest if you don’t own a drum sander, which I don’t.
First thing I do is sharpen my plane. This is an essential step. Without a sharp plane you aren’t going to get through that end grain. If you do this and you feel like you are pushing extra hard and your plane isn’t cutting or it’s getting caught or skipping along then you need to sharpen your iron again.
Here’s a quick video on how I do flatten an end grain board with a hand plane. I’ll give you some tips after you watch.
Tip one, see how I don’t go all the way to the far edge, I plane toward the middle. This is important because when you plane end grain you will blow out the far edge. Those fibers aren’t supported by other fibers and you will rip them apart rather than cut them. If this happens, hopefully it isn’t too bad and you can fix it when you route your edges. If it is really bad, you can cut a little off your board later.
Tip two, pay attention to your blade. You want it to be flat across the work surface. If you dig in on a side you are creating a ton of work to sand out those gouges. In your first stroke, check to see how it’s cutting. Make adjustments and test again until you have it right. Then go to town.
Step 7: Route details
There are three details to consider routing into your cutting boards
A way to pick it up
A juice groove
Softened edges
The first, a way to pick the board up, aka handles, is more important the flatter and heavier the board is. If you do a good job flattening, your board will be flat. A flat board on a flat counter, such as granite, will actually create suction that makes the board hard to pick up. So route some channels to use as a finger grip to pick them up. I have two ways I like to do this. A groove in the middle, for thick boards, or a groove on the bottom, for thinner boards. The middle groove needs supporting material on two sides, so it needs a board 1.5 inches thick or greater, if it’s thinner, then a bottom groove is fine and still looks great.

Middle handle

Bottom handle
If you are wondering how to make these handle grooves, it’s actually not as hard as it looks. If you have a router that is. For the middle groove, the first step is to mark the center of the board where you want the groove to land. Then clamp it to your bench with the part you want the groove in up and flush with your bench top. Then take your router with a tray or cove bit in it and plunge it down so the middle of the bit touches the line. Now, take a board and clamp it to the bottom of your router with a couple of spring clamps. This will make a fence on your router so you can consistently make the cut on both sides of the board. Now set your depth gauge on the router for a 3/8 to 1/2 inch cut. I’d start at 3/8 and see what you think, you can always go deeper if you want more of a hold. The last prep step is to mark a start and a finish line and start cutting. Don’t go full depth in one pass though, take a few shallow passes and leave a super shallow pass for your final one. This way if you get any burn marks you can hopefully route them out so you have less sanding to do. You will have to sand these, which I do by hand. It’s a pain but it’s doable.
The edge handles are easier, if you have a router table. If you don’t, follow the same steps as above but instead of marking the center, mark the end so your router bit will hang off the edge as it cuts. If you have a router table then set it up with the tray or cove bit and set it to the height you want to cut, mark either side of the bit on your fence and make a start and stop line on your board. Then to cut, just enter the cut at the start of your board line on the far side of your router bit, then push it along until your second board line meets the close side of the bit. Repeat by sliding the fence backward until you get to full depth.
A juice groove is up to you. You can do one side with a groove and one side without. Or you can completely ignore it, it depends on what you want to use the board for. I have a board I only use for carving, it has a groove, so I don’t generally need another juice grooved board. I also don’t like juice grooves on my daily use board because it makes it harder to scrape a pile of vegetables off the side into a bowl or onto a plate.
Softened edges are a must for two reasons. The board user doesn’t want to get cut on a sharp edge, trust me, those edges are sharp. And secondly, a sharp edge like that will get dinged up. It’s sharp, but brittle. So either round them over or bevel them. Both are great, just personal preference. If you are going to bevel, I suggest using your table saw instead of a router. I find a router tears out easier while a table saw won’t.
Step 8: Sand and finish
The home stretch. Sand the top and bottom from 80 to 220 using a random orbital sander. Use a pencil, scribble on your board, and sand until those scribbles are gone. I do that for 80 grit and forego it for higher grits. You will spend twice as much time sanding at 80 grit to get it all smooth and perfect. One way to speed this process up is to wet the board with water and let it soak in for a few minutes, then sand at 80 grit. The water will soften the end grain so the sand paper cuts easier. The only problem with this method is you have to let the board dry before going back at it a second time with 80 grit to make sure you have the board all flat, but it does save quite a bit of time.
After you finish with 80 grit the rest will go quick. Just make sure to wipe the board down between grits to remove all old dust and any grit left over. If you don’t you may be dragging around a big bit of something that will cause deep scratches and defeat your sanding.
Once you sand all the way to 220, wipe down the board and spray it with water. Then let the board dry. Doing this will raise the grain of the board which will make it feel rough, but you want that. Lightly sand it again with 220 to knock the grain back down and you are ready to finish.
I like to do this in two parts. First, pour on a little mineral oil to saturate the entire board. Once the whole thing is wet with mineral oil, let it sit for 30 minutes. If there is excess on the board, wipe it off.
The mineral oil will penetrate and help protect the board from moisture, but it will wash off. So add a second layer of protection, board conditioner. If you are out, you can purchase some from my products page. It’s just mineral oil and beeswax turned into a paste. Take a lump of the stuff, use a lint free cloth and wipe it on. Let it sit for 30 minutes and buff off any excess. Since this is a brand new board it wouldn’t hurt to do two layers, but if this is your board and you are a wood worker, you will take care of it by reapplying every 2 - 3 months with regular use.
That’s it, an end grain cutting board. If you want to add feet, here’s a little guide on how to do that. They aren’t necessary, but if your board slides around or is not quite level, the feet help fix that.