
Project Process
The end of a project is a joyous moment, a time for reflection, with a touch of sorrow.
I equate it to a good book. There is a long setup laying out the character’s and backstory, sucking you in to a world all to yourself. Then the action happens, there’s a flurry of activity with the inevitable challenges to overcome capped off by a suspenseful ending releasing you into the calm aftermath where you close the final page and are left with a nagging want for more.
As I end my current project I was reflecting on the process and realized I should share the steps I take on each one of my builds.
Every project follows a work flow, going through three major phases and sub steps all done in a specific order. Woodworking is all about the order of operations. Done right, you will save time and effort, done wrong and you will pay in time and quality. I learned this long ago and want to share my experience with you to get you past the starting blocks and thinking ahead to the challenges you may face.
Let’s dive in to the three phases, Planning, Building, and Ending.

A simple sketch, with dimensions, and a note or two. That’s often all it takes to get started.
Planning
This first phase takes the longest duration but is the least amount of effort. Much of the planning phase is spent waiting. Waiting for the okay, waiting for deposits, waiting for materials, waiting for the bench space to start.
Simple as it seems, the planning phase is the most important. It’s where expectations are set, designs are finalized, and plans are made. If working with a client, this phase is all about communication. Make sure you are relaying what you need early and often. Clear all ambiguity now, even if it’s uncomfortable. If you are 6 months out from starting their project tell them. You may lose a job, but that’s okay, if you are booked for 6 months you must be doing okay.
This phase is also an opportunity for you to decide if you want the job. I’ve run across projects I turned down because it wasn’t in my wheelhouse. I knew I couldn’t do what the client wanted, and they appreciated my transparency. Proper treatment of the planning phase will save you headaches later.
Here are the planning steps
Idea
It all starts with an idea. Someone, whether that’s you or a client, has a furniture request and some outline in their head, usually based on pictures from Pintrest or Etsy. Usually this comes in the form of multiple ideas needing to be mash together or a description with elements of interest to include or even the holy grail, a vague description and the liberty to make whatever you want.
Specifications
After a general understanding is jotted down, it’s imperative to ask a few questions to develop a rough estimate. This initial price helps level set and save everyone time. If it’s out of budget, the conversation can end with relatively little investment from both sides. Here are the typical questions I ask.
What type of wood? If they don’t know, I ask dark or light, knowing light will be Maple or Ash and dark will be walnut, cherry, or white oak. When they settle on a species I know what the general price per board foot is for that type of wood to estimate material cost.
Width, length, and height and if unknown, at least a general size to gauge material use.
Features such as how many drawers, doors, shelves, etc. Hardware is expensive and you need to factor that into the rough estimate.
When would you want this by? This is where you can set expectations. Sometimes the client will say something like, “No rush, 2 - 3 weeks would be fine.” To which I reply, “I’m 4 months out from even starting this project.” If that doesn’t work for them, then we part ways now, if they are okay with waiting then we are good to proceed.
Design
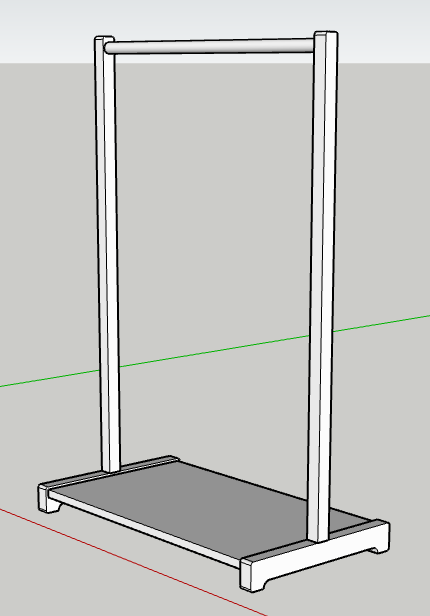
Some projects require more detail. In this case I was worried about the proportions, that’s where a 3D modeling tool comes in handy.
The complexity of the design phase is dictated by your familiarity with the piece. If you’ve made it before then this is simple, you have plans and pictures already. If it’s new but similar to other work, a hand drawn picture with a few jotted down specs may suffice. But some projects dictate a full blow 3D model. These don’t create themselves, so factor it into price.
The nice thing about a 3D design is it helps you figure out all the details and material use. You can plan out joinery and know exactly what dimensions each part needs to be.
After I have a plan I draw up a final quote, factoring in material cost, labor, and and any additional tools or consumables, such as sand paper. Then I provide that with the plan to my client, asking for a 50% deposit. The deposit secures the clients spot on my list and allows me to buy materials.
Procurement
A fancy word for buying stuff. This usually means a trip to the lumberyard and a stop by Rockler for hardware. Typically I’ll do all my buying well in advance so the wood can acclimate to my shop for a few weeks. I also like to have the hardware ahead of starting so I can adjust any sizes based on installation instructions for hinges and such.
Building

Milling
Finally, the project is underway. Let the sawdust fly! Seriously, milling creates the most sawdust in the entire process.
So what is milling? It is the act of flattening and straightening lumber. Simple, but the most essential step in this whole process. A warped board can be mitigated based on how it’s used, but flat, square stock makes everything so much easier.
Typically, it is best to rough cut your boards down to make milling easier and to retain material. A slight bow in a 10 foot board could mean taking off a 1/4 inch of material along the length vs 1/16 off a 3 foot section of the same board.
Also, I do this step completely without a jointer, here’s a video guide on how I do it with just a planer. If you’ve seen process before from other sources, my method is worth a watch because it’s faster and easier than what you’ve seen before.
Joinery
Complicated or straightforward, this step is the most crucial to the construction of any piece. Joinery connects parts together to form a piece of furniture. If done right, everything will come together nicely, leaving you straight lines, no gaps, and a beautiful piece. Done wrong and you may have a downright amateurish piece. Nothing wrong with that for a beginner. Heck, wood filler ended up being structural in my first project.
The point is, go with what you know for client work and test yourself on pieces you make for yourself. Try replacing screws with mortise and tenon or try your hand at dovetails, worst thing that could happen is you learn a new skill, and that’s a pretty good worst thing.
Assembly
The act of taking those parts and putting them together. This usually goes in phases and pops back and forth between this step and the finishing step.
But assembly always starts with dry fitting. That’s where you put the piece together without glue. I used to skip this step. A terrible idea. Dry fitting helps you catch mistakes and issues before you are fighting against glue setting up.
Recently, I was building a free standing cabinet, and I assembled the piece in phases. First the sides, dry fit, then took them apart and glued them back together. Once dry I dry fit the cabinet together, took it apart and did final assembly. In my final dry fit I realized the floating tenons were slightly too long and bottoming out before the joint would close. Luckily I was able to take the piece apart, trim the tenons down, and make sure everything fit perfectly.
Catching that early leads to a reduced stress final assembly when glue is drying, mallets are flying, and clamps are being maxed out to squeeze everything together.
Finishing
Oddly enough, finishing isn’t the end. I define finishing as the act of preparing for and applying wood finish, which happens in multiple parts. There’s preparing for finish, usually sanding, and applying finish, some type of protective coating. I mentioned in the last section that finishing happens throughout assembly. That’s because there are areas in a project you want to pre-finish, otherwise they will be too hard to sand, such as the inside of a drawers or bottom of a tabletop. It’s so much easier to sand parts when they can lay flat on the bench and when you can get into all the corners.
The caveat here is to wait on outside facing parts. You want to sand these bits together after assembly so they come together nicely. Back to the cabinet I just built, I was off a little bit in a few of my joints, but a little hand plane to smooth and sanding brought everything flush. You would never know this joint was off by 1/64th straight out of the clamps.
Lastly on finish, make sure you are using the right type and know how it’ll look after. This is one of those experience things, but you can bypass the time allotment of knowing what looks good on which wood types by testing finishes on offcuts from your project. Here’s a short guide on the basics.
Light woods are yellowed by oil finishes, so stick with water based.
Dark woods lose the grain depth with water based, so stick with oil.
Film finishes require extra time and offer superb protection for high traffic surfaces, but they cannot be easily repaired.
Penetrating finishes provide a matte finish, leaving the wood feeling like wood, but require regular maintenance. Dust will tend to stick easier and dusting is harder, so not a good candidate for bookshelves.
Hard wax oils are touted as the best of both worlds between film and penetrating finishes. They are easy to apply, repairable, and durable. They give the wood a natural look, but do not provide a sheen and do require maintenance just like penetrating oils making them too much maintenance for some clients.
Whatever you do select, tell the client, write it down and stick it in a drawer or tape it to the underside of the table. It may seem unnecessary, but one day when the piece needs some maintenance and the client calls you to sand out some scratches and refinish you will thank yourself.
Ending
I consider everything after completion of the piece in this phase. This is the second most critical phase of the entire process, behind planning. Why? Because it can all go wrong in an instant. Weeks or months of hard work can be ruined in this phase, whether due to delivery issues or problems with the piece causing major rework.
Delivery
Wrapping the piece in blankets, carefully loading it into a vehicle, and slowly driving it to the client’s house. This is the most nerve wracking part of any project. The last thing you want is to watch a month’s worth of effort be destroyed by something as silly as rain or a loose strap.
Delivery often also means putting it in place, so plan for that. If you cannot lift it by yourself, make sure your client is willing and able to help. If they are not, you’ll need to source help another way. Whether that is your spouse, a kid, or a friend, just make sure to compensate them appropriately for their time, otherwise they may not be so willing when you call again.
Acceptance
You have finally made it. The piece was transported and now in the clients home, and the worst thing of all happens. The buffet you made rocks and you didn’t put leveling feet on it, the table is 1/2 inch too low for the chairs the client already had even though you built it exactly to spec, the client notices a flaw and wants it fixed prior to payment. Whatever the issue is, this is where your headache can become earsplitting.
So plan ahead. Bring extra felt pads for the feet, a necessary addition on hard surfaces, include a few basic tools in your bag so you can make adjustments, a few necessities can come in clutch in case the client wants the bookshelf you made attached to the wall because their toddler is a climber.
The small things go a long way and remember, you aren’t here to drop off a build and never see this person again. You are there to build a relationship. This person will be a repeat customer. Be prepared to show off your work and tell them about it. It’s okay to go into a little detail about the process, they ordered from you because they appreciate the craftsmanship, so show off. Then turn the tables and ask them about an interesting painting hanging on the wall or a cool live edge coffee table. There may be a story behind it they like to tell, and even a request for a matching piece in the future.
Lastly, collect final payment. Again, be prepared. Some clients still write checks. Others are tech savvy and use Venmo or PayPal. It’s always good to discuss this ahead of time so you they know what to expect. Even if you’re a small business like I am, your clients expect you to operate like a business.
Retrospective
All projects, good and bad, need a retrospective, a time to review your successes so you can repeat them next time and identify the opportunities for improvement. All too often we move on without this step. One project ends so the next must begin, but taking a few extra moments, no more than an hour, to write down your thoughts is the most important part of any project. This time is an opportunity for you to grow, to improve, to notate where you will challenge yourself on the next build.
I hope that list helps you overcome the fear to start. My advice, get started and figure it out as you go. Good news is you are a woodworker and you can fix any mistakes you make.